Sunday, August 31, 2014
How to Backup and Factory Reset Hard Reset Motorola Moto G
Backup & restore
Your Google account data is backed up online. If you reset or replace your phone, just log in to your Google account to restore the contacts, events, and other details you synced with the account. To choose what syncs with the account, touch Apps > Settings > Google, touch your Google account, and check things to sync. Please note that text messages, call logs, and items stored on your phone will not be restored. To restore your Google Play™ Store apps, see “Take care of your apps”.
Resetting Motorola Moto G on Settings:
Warning: All downloaded apps and user data on your phone will be deleted. Data on the cloud will not be deleted.
Read More..
Your Google account data is backed up online. If you reset or replace your phone, just log in to your Google account to restore the contacts, events, and other details you synced with the account. To choose what syncs with the account, touch Apps > Settings > Google, touch your Google account, and check things to sync. Please note that text messages, call logs, and items stored on your phone will not be restored. To restore your Google Play™ Store apps, see “Take care of your apps”.
Resetting Motorola Moto G on Settings:
- On your Home screen, touch Apps.
- Go to Settings > Privacy.
- Tap on Factory Data Reset.
- Then tap Reset phone.
- And Erase everything to confirm the reset.
Warning: All downloaded apps and user data on your phone will be deleted. Data on the cloud will not be deleted.
How to Hard Reset Motorola Moto G:
These steps is also helpful when your Motorola Moto G is unresponsive or frozen and theres no way to access the settings. If it is frozen, remove the battery and reinsert it after a few minutes.
- Power up the device pressing both Volume UP and Down keys at the same time. Use the Volume down key to highlight recovery mode and volume up to select it.
- When in recovery mode, you will see an android with a red triangle. Press Volume up and Volume down at the same time. This will bring up a blue menu at the top of the screen.
- Press Volume down to select "wipe data/factory reset" and press the Power key to select it.
- Now press Volume down to highlight Yes and press power to select it.
- Finally, when the device finishes it will have "reboot system now" selected. Just press power to select that option.

How To Hard Reset Samsung Galaxy Chat B5330
Hard Reset Samsung Galaxy Chat B5330

Use this method to hard reset your Samsung Galaxy Chat B5330 :
Enter *2767*3855#.
Warning! All your data including contacts, messages etc. will be lost!
Copy all your necessary data/Contacts/Messages etc. to SIM or make backup to your PC before full reset! Take out SIM card before full reset.

Reset you Samsung Galaxy Chat B5330 Your device freezes or has fatal errors
If your device freezes or hangs, you may need to close programs or reset the device to regain functionality.
If your device is frozen and unresponsive, press and hold the Power key for 10-15 seconds. The device will reboot automatically.
If this does not solve the problem, perform a factory data reset. In Idle mode, open the application list and select
Settings > Privacy > Factory data reset > Reset phone > Erase everything.
Select Settings > Privacy > Factory data reset: Reset your settings to the factory default values and delete all your data.
Press Application button, then Settings > Reset settings: Reset your settings to the factory default values.
While using your device, be sure to back up important data. When disposing of your device, back up all data and then reset your device to prevent misuse of your personal information.
Use this method to hard reset your Samsung Galaxy Chat B5330 :
Enter *2767*3855#.
Warning! All your data including contacts, messages etc. will be lost!
Copy all your necessary data/Contacts/Messages etc. to SIM or make backup to your PC before full reset! Take out SIM card before full reset.
Nokia C1 01 Mamory card ic jumper solution tested 100
C1-01 Mamory card ic jumper solution


Asha 305 Asha 306 Battery Connector Ways Jumpers
This article is about Nokia Asha 305 and Nokia Asha 306 Battery Connector Ways. The solution available in this post applies to both of these phones. There are some differences in these phones like Asha 305 is a Dual Sim phone where Asha 306 is single but battery connector and parts around it are the same for these two mobile phones.
Nokia Asha 306 Battery Connector is soldered to the motherboard like most of the Nokia phones. If its solder points also called prints are broken whether by removing or any other reason diagram below can help you. I have marked all the battery connector jumper points with different colors. Red(Positive), Black(Negative) and finally Green(BSI).
Please Note that we will edit these solutions or add new ones if found in this page at any time in the future. So feel free to come back any time on this page to stay up to date.
If you have further Questions please dont hesitate to leave a comment.
Note: Every repairing solution posted here is tested by at least one member of our team. Use the information available here at Your Own Risk. We are not responsible if any harm comes to your device during the repairing process.
Nokia Lumia 822 Tips and Tricks
How to Factory Reset (Hard Reset) Nokia Lumia 822
There are two ways on how to reset your Nokia Lumia 822, it can be through the hard reset or soft reset. When you say hard reset it involves on the hardware part, so you need to remove the battery of you Nokia Lumia 822 and reinsert it. Then turn on your device normally. This should refresh the content of your device but will not remove any data.
Software reset will return your device to its default settings. Like a brand new phone, no information or data saved on your device. This procedure will erase all your data save on your phone.
If your Nokia Lumia 822 is frozen, it is recommended to perform the Hard Reset.
You can soft reset your Nokia Lumia in two ways. By accessing it through settings or doing the hard key combination.
Resetting through the settings:
Go to Settings > About > reset your phone.
Hard Key Combination:
Use this option if your device is locked and you dont know the code.
Note: Make sure that your Nokia Lumia is turned off.
Step 1. Press and hold the power key until it vibrates then release.
Step 2. Press and hold the down key volume. If the exclamation mark will be shown on the screen, you can now release the button.
Step 3. You need to input these key combination:
Volume Up > Volume Down > Power > Volume Down.
Your phone will reset and will boot up automatically. This might take a several minutes.
How to Extend Battery Life of Nokia Lumia 822
Battery Life depends on how you use your device. For Nokia Lumia 822 device, if you want to save your battery to last longer hours, you may need to adjust your settings. Follow these suggestions:
• Turn on the power-saving option on the device. Then lessen the screen brightness and the screen lock timeout. On the Home Screen, swipe left, then tap on the Gear Icon or Settings > Battery saver.
- Be reminded that when your phone goes into battery saver mode, you may not be able to change the settings of all apps.
- If you want to change the settings of the Battery saver, tap on Advanced.
• Turn down your device volume with the volume keys.
• Close any apps or features when you are done using it so they will not continuously running in the background.
• Turn off the network connection if you are out of range so that your device will stop searching for a network signal.
• You should use the latest version of the software update. Software updates improves some features and fixes some bugs on the previous software version.
• Turn off the camera flash.
• The camera viewfinder can be a power drain, so after youve finished taking photos, press the left arrow key.
How to Update Your Nokia Lumia Device 822
How to Track and Delete Files Remotely on Your Lost Windows Phone
Did you lose your phone? Or misplaced it? Worried about your files? So many questions but only one answer. Go to www.windowsphone.com. In this site you can track your Windows phone, delete your files, make your phone ring, and locked your phone to show a message to return it.
How to make your phone ring:
How to Erase your phone:
How to Make a Conference Call on Nokia Lumia 822
Conference calling is a network service. The maximum number of participants involve in a conference call varies by network service provider. Nokia Lumia 822 supports conference call between two or more people. Well, heres how you can make a conference call using your Nokia Lumia 822 phone.
1. Call the first participant of the conference call.
2. To add the second participant of the call tap on and dial the number.
3. Once your call is answered by the second participant, tap on to start the conference call.
4. If you wish to add another participant while the conference call is going on, just tap.
5. Now, if you want to have a private conversation with someone while youre on a conference call, just tap and the persons name or number. The conference call is put on hold while other participants continue the conference call. Tap on to return to the conference call.
Contacts is very important for everyone of us. We cant connect to our friends without a contact number. If you have a new phone, saving contacts on the phone one by one is so hassle. But now, theres an easy way how to transfer or import your contacts from your old phone to your new phone.
Use your PC to transfer contacts to your new phone. This process is applicable in several phone brands, including iPhone, Samsung, HTC and Nokia.
You just need an Internet Connection on your PC, your old and new phone and their own USB cable.
If you are not prompted with a pop-up window to install the PC Companion, you can also download the PC Companion here.
Read More..
There are two ways on how to reset your Nokia Lumia 822, it can be through the hard reset or soft reset. When you say hard reset it involves on the hardware part, so you need to remove the battery of you Nokia Lumia 822 and reinsert it. Then turn on your device normally. This should refresh the content of your device but will not remove any data.
Software reset will return your device to its default settings. Like a brand new phone, no information or data saved on your device. This procedure will erase all your data save on your phone.
If your Nokia Lumia 822 is frozen, it is recommended to perform the Hard Reset.
You can soft reset your Nokia Lumia in two ways. By accessing it through settings or doing the hard key combination.
Resetting through the settings:
Go to Settings > About > reset your phone.
Hard Key Combination:
Use this option if your device is locked and you dont know the code.
Note: Make sure that your Nokia Lumia is turned off.
Step 1. Press and hold the power key until it vibrates then release.
Step 2. Press and hold the down key volume. If the exclamation mark will be shown on the screen, you can now release the button.
Step 3. You need to input these key combination:
Volume Up > Volume Down > Power > Volume Down.
Your phone will reset and will boot up automatically. This might take a several minutes.
How to Extend Battery Life of Nokia Lumia 822
Battery Life depends on how you use your device. For Nokia Lumia 822 device, if you want to save your battery to last longer hours, you may need to adjust your settings. Follow these suggestions:
• Turn on the power-saving option on the device. Then lessen the screen brightness and the screen lock timeout. On the Home Screen, swipe left, then tap on the Gear Icon or Settings > Battery saver.
- Be reminded that when your phone goes into battery saver mode, you may not be able to change the settings of all apps.
- If you want to change the settings of the Battery saver, tap on Advanced.
• Turn down your device volume with the volume keys.
• Close any apps or features when you are done using it so they will not continuously running in the background.
• Turn off the network connection if you are out of range so that your device will stop searching for a network signal.
• You should use the latest version of the software update. Software updates improves some features and fixes some bugs on the previous software version.
• Turn off the camera flash.
• The camera viewfinder can be a power drain, so after youve finished taking photos, press the left arrow key.
How to Update Your Nokia Lumia Device 822
There will come a time that Nokia or your Internet Service Provider (ISP) will give a software update for Nokia Lumia device. Verizon did update the Nokia Lumia 822 and has been already rolled out via OTA (Over The Air). The update may come by batch, but if you have not receive the update for a while, then you may need to manually check for the updates.
How to manually check for updates on your Nokia Lumia:
- Go to Settings, and select Phone Update.
- To check for the new updates just tap on Check for Updates.
You need to update your device to experience the improvements and some features added on your Nokia Lumia device.
How to Track and Delete Files Remotely on Your Lost Windows Phone
Did you lose your phone? Or misplaced it? Worried about your files? So many questions but only one answer. Go to www.windowsphone.com. In this site you can track your Windows phone, delete your files, make your phone ring, and locked your phone to show a message to return it.
Find my Phone will make your life easier to find it or it can also prevent other person from using it without your consent.
How to Track your Phone / Map Location:
- Go to www.windowsphone.com.
- Point your mouse on "Explore My Phone" and click Find My Phone.
- Sign in with the same Microsoft account you used to sign in on your phone.
- If you are not seeing the latest location of your phone, click Refresh.
- You can also print the hard copy of your phone location, just click Print.
- Click Center on Map if you lost the location of your phone.
- While you are sign in on www.windowsphone.com, click on Ring.
- Just follow the instructions to make your phone ring.
- While you are sign in on www.windowsphone.com, click on Erase.
- If you are sure to erase your phone, click on Yes! Erase my phone immediately check box.
- To confirm click Erase.
How to Lock your phone and show a message:
- While you are sign in on www.windowsphone.com, click on Lock.
- Just follow the instructions to lock your phone ring.
- If you dont have a password then you need to create one, you will use it to unlock your phone if you get it back.
Conference calling is a network service. The maximum number of participants involve in a conference call varies by network service provider. Nokia Lumia 822 supports conference call between two or more people. Well, heres how you can make a conference call using your Nokia Lumia 822 phone.
1. Call the first participant of the conference call.
2. To add the second participant of the call tap on
and dial the number.3. Once your call is answered by the second participant, tap
on to start the conference call.4. If you wish to add another participant while the conference call is going on, just tap
.5. Now, if you want to have a private conversation with someone while youre on a conference call, just tap
and the persons name or number. The conference call is put on hold while other participants continue the conference call. Tap on to return to the conference call.Use your PC to transfer contacts to your new phone. This process is applicable in several phone brands, including iPhone, Samsung, HTC and Nokia.
You just need an Internet Connection on your PC, your old and new phone and their own USB cable.
Then you need to install the PC Companion program. This is a free application and the installation files are already saved on your new phone. This program can also be used in updating your phone software.
Please note that if you are using the Microsoft Windows 7 operating system on your PC, make sure that the AutoPlay setting is enabled.
To check your settings:
Click Start > Control Panel, then type "autoplay" on the search box. Click the AutoPlay, and mark the check box Use AutoPlay for all media and devices.
Installing the PC Companion:
Installing the PC Companion:
- Turn on your new Phone and connect it to your PC.
- On your new Phone, tap "Install" to install PC Companion on the PC.
- On your computer, if a pop-up window that appears notifies you about available PC Software, select Run Startme.exe.
- Then click Install to start the installation and then follow the instructions to complete the installation.
If you are not prompted with a pop-up window to install the PC Companion, you can also download the PC Companion here.
Transferring your contacts to your new phone:
- Make sure that PC Companion is installed on your PC.
- Open the PC Companion application on your PC.
- Then click Contacts Setup and follow the instructions to transfer your contacts.
nokia c5 only vibrate no power on
nokia c5 only vibrate no power on problem can be cause of water damages. So after disassemble clean the whole mother board and apply hot air to make it dry. Do not apply much hot air to because it may can harm your skin and damage the board.

In the above diagram you can see a resistance remove this if only cleaning the board can not solve nokia c5 only vibrate no power on problem.

In the above diagram you can see a resistance remove this if only cleaning the board can not solve nokia c5 only vibrate no power on problem.
Samsung I6220 Star TV Service manual Schematic and Disassembly
This is the service manual the Samsung I6220 Star TV Repair Guides and Troubleshooting for the following problems like:

* Software Downloading - Firmware programming
* Touch Screen Problem - Touch Screen Not Working
* Not Charging Problem - Abnormal charging
* Power ON problem- Power On does not work
* Initial Failure problem - Hang, frozen and restart
* LCD Display problem - Abnormal Display
* Micophone Problem - No voice call sound transmit
* Camera problem - Camera Function not working
* Speaker problem - buzzer speaker malfunction
* Sim Card problem - insert sim card error, sim card not detected or recognize
* Bluetooth and WiFi problem -Bluetooth and Wifi operation failures
* GSM network signal problem - No Signal on GSM network
* WCDMA network signal problem - No signal on WCDMA network
The documents also attached are Disassembly and Reassembly Manual, Product Specification, Exploded View, Electrical parts, Parts list PCB board layout , Block and Schematic diagram.
Samsung I6220 Star TV service manuals, assembly - disassembly instructions, troubleshooting guide and schematics. Check the download links below:
Note: we only spotted this links, we do not host or upload the files.
1/Heardsolution.blogspot.com
2/Heardsolution.blogspot.com
Saturday, August 30, 2014

Factory Data Reset Samsung Galaxy Tab 7 0 Plus
Factory Data Reset Samsung Galaxy Tab 7.0 Plus - Samsung Galaxy Tab 7.0 and could be a tablet created by Samsung that options 7.0” PLS alphanumeric display electrical phenomenon touchscreen (600 x 1024 pixels resolution) with measuring system, Multitouch, TouchWiz ux UI, Gyro detector and Proximity detector. It uses android OS v3.2 (Honeycomb) and supercharged by dual-core one.2 GHz CPU, Mali-400MP GPU, Exynos 4210 chipset, and 1GB RAM.

The internal memory offered are 16 or 32 GB reckoning on the variant chosen together with microSD card support up to sixty four GB. 2 cameras square measure present: on the rear of 3.15 megapixel and a couple of megapixel camera on the front. 720p HD video could also be taken at thirty frames per second. For connectivity: optional 3G, WiFi 802.11 a / b / g / n and Bluetooth 3.0. The USB port may be accustomed connect external devices with MHL adapter (not supplied). The property options include: Wi-Fi 802.11 a/b/g/n, DLNA; Wi-Fi Direct, dual-band; Wi-Fi hotspot; Bluetooth v3.0 with A2DP, HS; Infrared; USB v2.0, USB Host support.
Factory Data Reset Samsung Galaxy Tab 7.0 Plus
How to Reset Samsung Galaxy Tab 7.0 Plus
You can reset your Samsung Galaxy Tab 7.0 Plus to return its factory default settings. It is recommended to back up your personal data such as contacts and image prior to performing factory data reset to the mobile device.
To hard reset/factory reset your Galaxy Tab 7.0, do the following instructions:
- From a Home screen, touch Apps ➔ Settings ➔ Privacy.
- Touch Factory data reset.
- The Factory data reset screen displays reset information.
- Touch Reset device, then follow the prompts to perform the Reset.
This action erases all data from the device, including Google or other email account settings, system and application data and settings, and downloaded applications, as well as your music, photos, videos, and other files. If you reset the tablet in this way, the next time you turn on your tablet you are prompted to reenter the same kind of information as when you first started Android.

no Nokia 5800 keypad unlock button not working solution
Nokia 5800 unlock button not working Solution

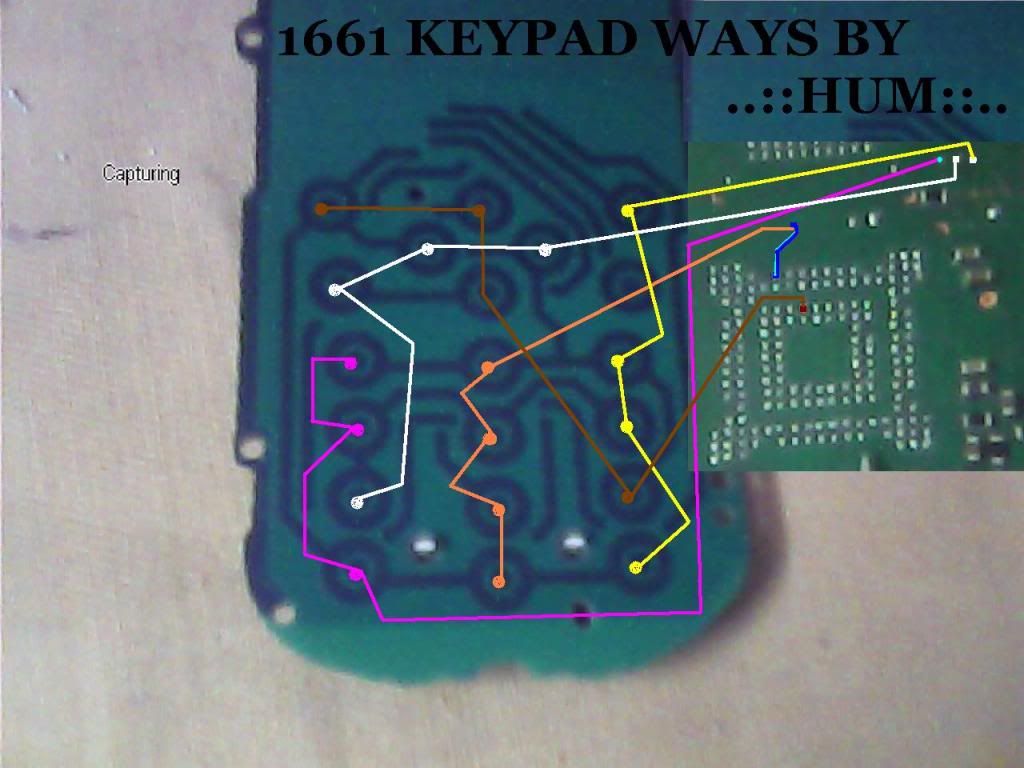
Nokia 2710 Keypad Not Working Solution 100 Tested

now i share this how to working fine
Nokia 2710 Keypad ways,Nokia 2710 some Keypad not working Solution,
Nokia 2710 Keypad not working Solution,
Nokia 2710 Keyad Line Missing Ways Solution,
Nokia 2710 Full Keypad Ways Solution,
Nokia 2710 All Keypad No Working Solution
can i help you to solved your problem ?
Please Write Me Only One Comment:) Dont waste your time to writing comment ok no problem now give me only 5 Seconds to Share My Post
-==bestmobiletrick==-
How To Change Samsung SGH N7000 Galaxy Note imei Guide
First Method:
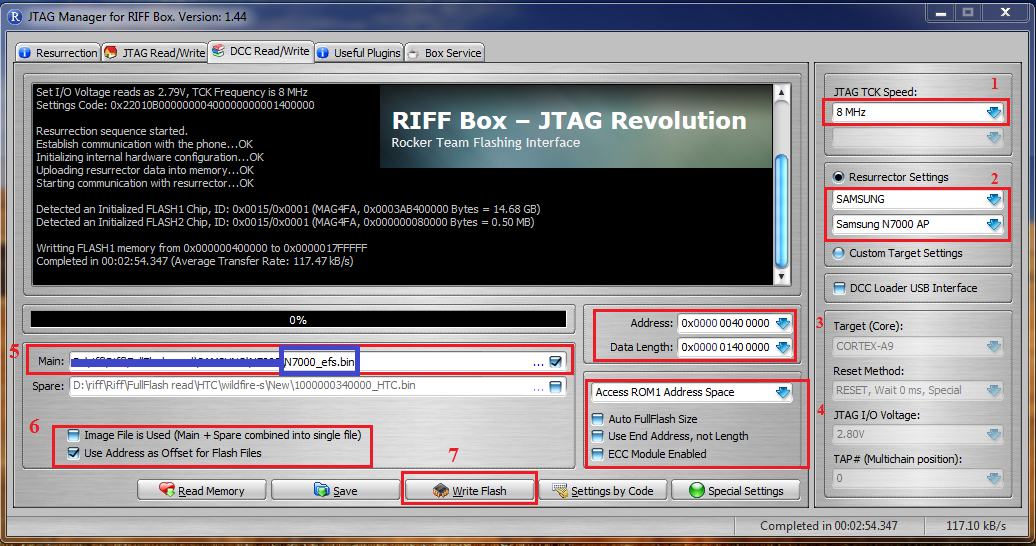
Guide:
1-Select "Speed"
2-Select "N7000" Model
3-Set "Start Address" "Data Length"
Start Address : "0x0000 0040 0000"
Lentgh : "0X0000 0140 0000"
4-Uncheck 3 option...Select "Rom1"
5-Open "N7000_EFS.bin" in "Main" Window
6-Select "Use Adress as Offset xxxxxx"
7-Press "write"
Download "N7000_EFS.Bin" From Here:
https://hotfile.com/dl/174870452/58c...0_EFS.rar.html
Second Method : (Write efs From Dump file)
Quote:
* Please Note : Dump Size Does not matter....So,User Can Use Any Size,More Than 128MB...
Its Means,You can use 128MB,256MB,512MB,1GB,----16GB
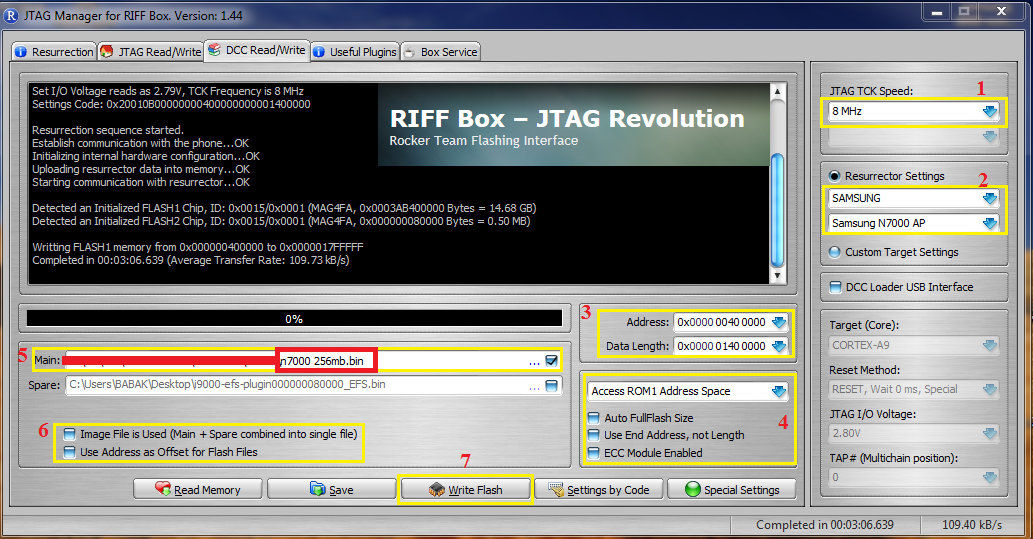
Guide:
1-Select "Speed"
2-Select "N7000" Model
3-Set "Start Address" "Data Length"
Start Address : "0x0000 0040 0000"
Lentgh : "0X0000 0140 0000"
4-Uncheck 3 option...Select "Rom1"
5-Open "Dump File" in "Main" Window
6-Select "Use Adress as Offset xxxxxx"
7-Press "write"
Guide:
1-Select "Speed"
2-Select "N7000" Model
3-Set "Start Address" "Data Length"
Start Address : "0x0000 0040 0000"
Lentgh : "0X0000 0140 0000"
4-Uncheck 3 option...Select "Rom1"
5-Open "N7000_EFS.bin" in "Main" Window
6-Select "Use Adress as Offset xxxxxx"
7-Press "write"
Download "N7000_EFS.Bin" From Here:
https://hotfile.com/dl/174870452/58c...0_EFS.rar.html
Second Method : (Write efs From Dump file)
Quote:
* Please Note : Dump Size Does not matter....So,User Can Use Any Size,More Than 128MB...
Its Means,You can use 128MB,256MB,512MB,1GB,----16GB
Guide:
1-Select "Speed"
2-Select "N7000" Model
3-Set "Start Address" "Data Length"
Start Address : "0x0000 0040 0000"
Lentgh : "0X0000 0140 0000"
4-Uncheck 3 option...Select "Rom1"
5-Open "Dump File" in "Main" Window
6-Select "Use Adress as Offset xxxxxx"
7-Press "write"
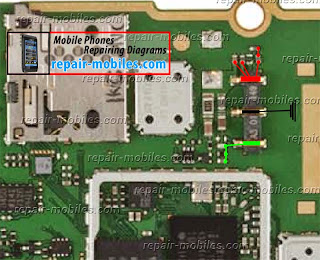
Nokia X6 Charger Not Supported Not Charging fix problem Jumpers Ways
Nokia Mobile X6 with Charging, Charging Jumpers, Charging Problem, Charging How to Fix problem, Charging Ways
if we plug in the charger to the X6 and it shows error loader not supported in this particular case, the loading pin works fine, the guilt of two important things on his charger is your first step to change the charger when not charging ok.
![]()
some working time may be the reason for janiuan charger charger charger janiun problem.if supported it may be that you 47k this resistance is defined in schedules attached to this post.so remove this resistor and a new one to replace Nokia Mobile on board for change.
for more detail and new tips and tricks about this problem keep visiting this page we will update it timely with new diagrams.some related post are also given bellow you can read them also for more information.
if we plug in the charger to the X6 and it shows error loader not supported in this particular case, the loading pin works fine, the guilt of two important things on his charger is your first step to change the charger when not charging ok.
some working time may be the reason for janiuan charger charger charger janiun problem.if supported it may be that you 47k this resistance is defined in schedules attached to this post.so remove this resistor and a new one to replace Nokia Mobile on board for change.
for more detail and new tips and tricks about this problem keep visiting this page we will update it timely with new diagrams.some related post are also given bellow you can read them also for more information.

Friday, August 29, 2014


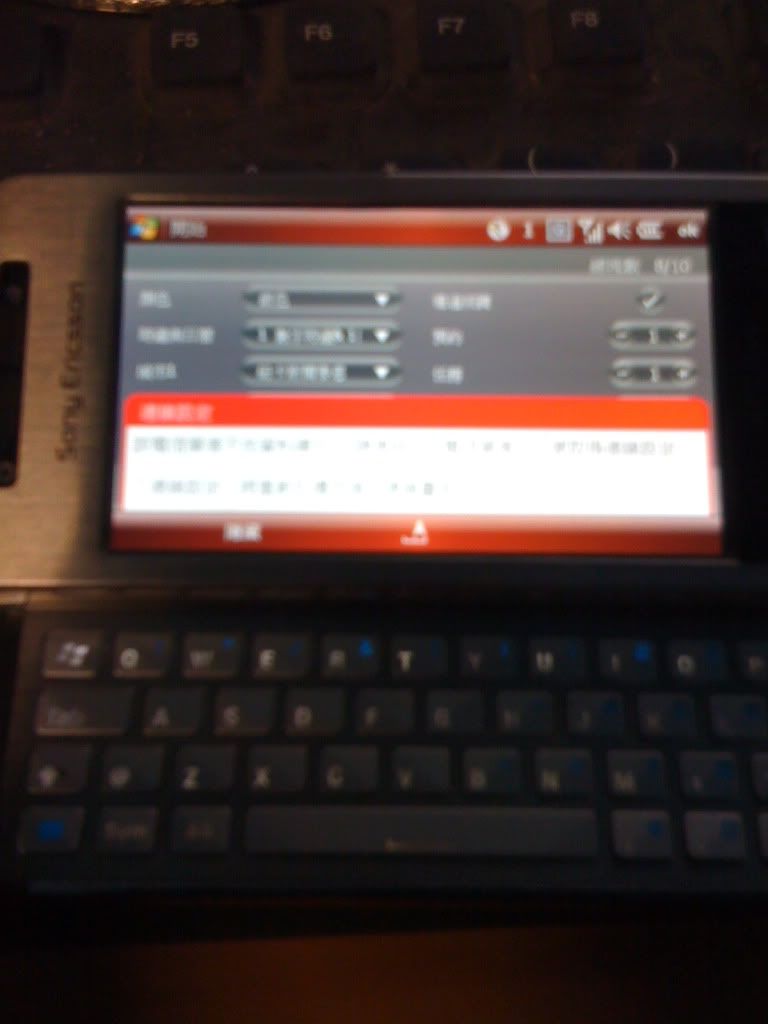
x1 xperia successfully change language from chinesse to english guide inside
x1 xperia successfully change language from chinesse to english ...guide inside
problem with Chinese language? yes we made this solution for you just follow under
Steps

cable used: usb cable
solution:
Step 1 (Preparations)
- Download and install .NET Framework 3.5 SP1
- If you are using Vista, install the Mobile Device Center 6.1
- Set up the Active Sync (active sync 4.5 for XP) / Mobile Device Center (Vista) connection with your X1
- Charge the battery to at least 50% or more
- (Re)Connect the X1
- Run X1_HardSPL.exe
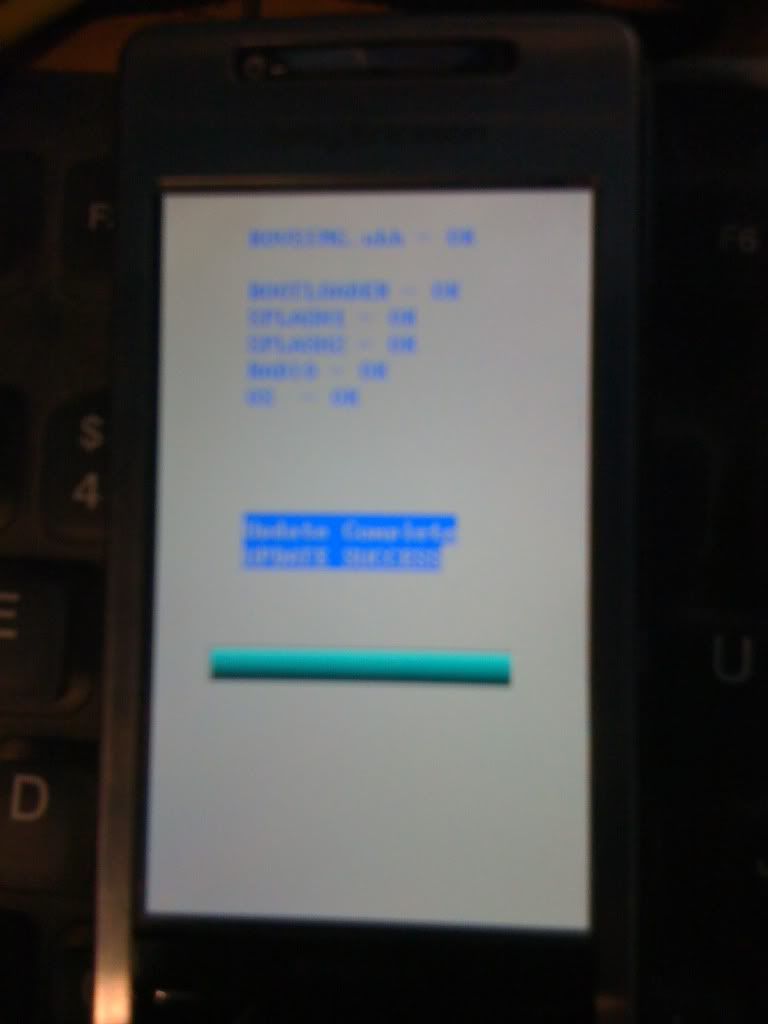
- Follow the instructions (it should say something like "Image Version: 1.02.111.7" to "1.00.X1")
- If asked, press "Yes" on the X1
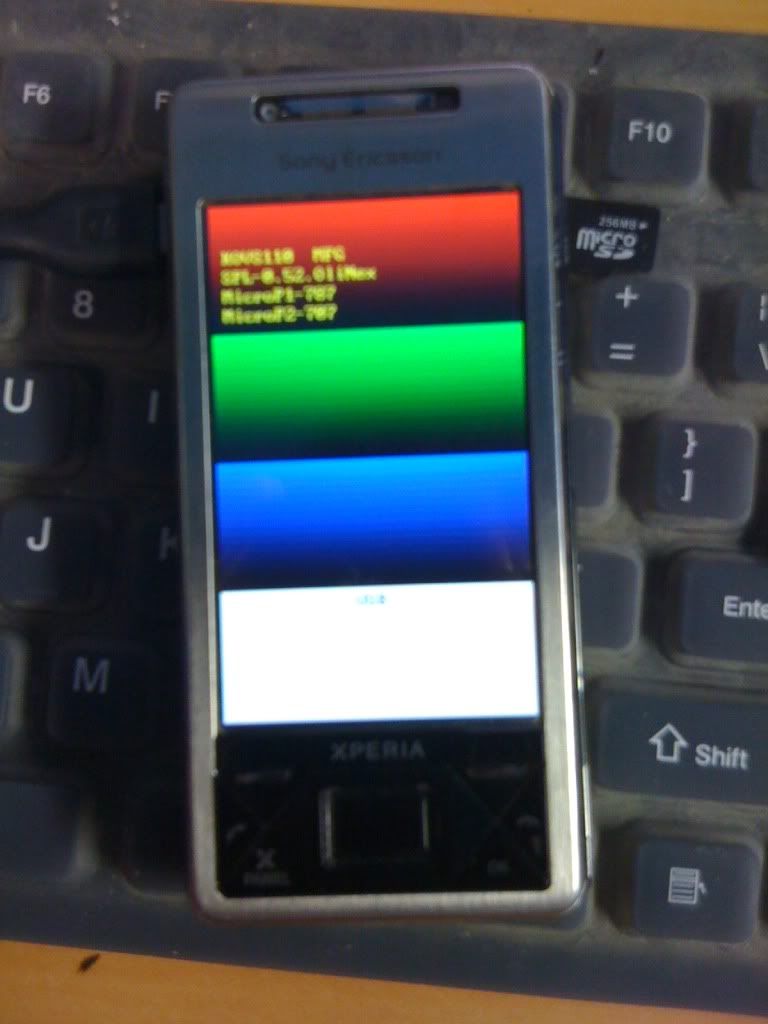
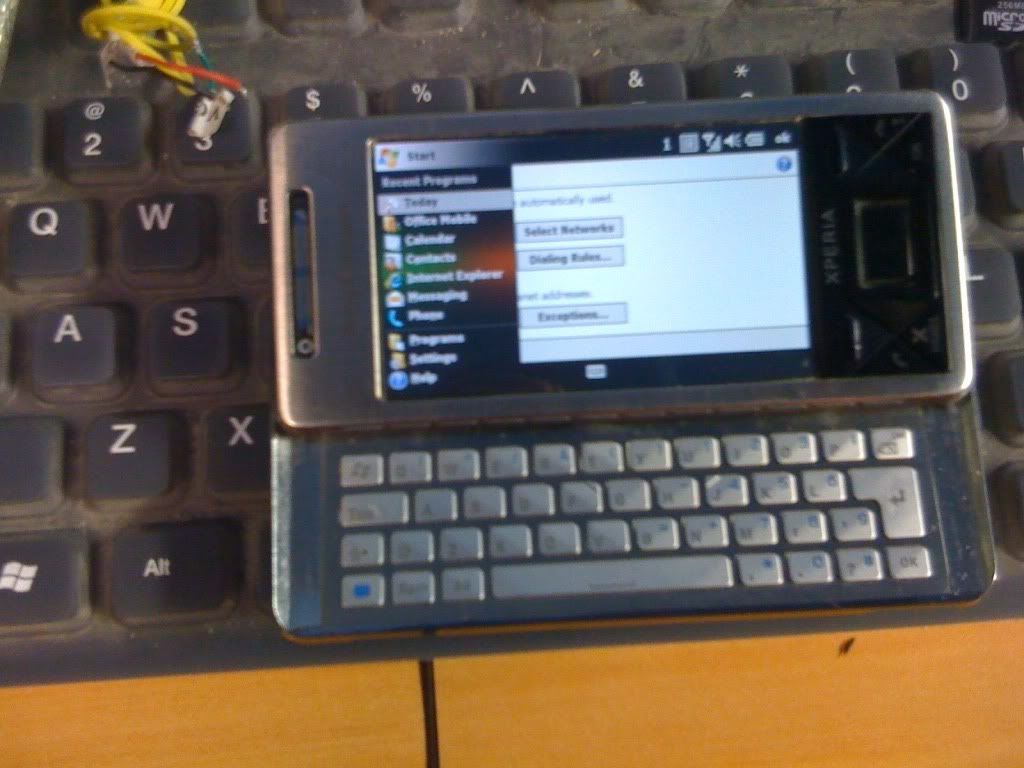
- Now a 4-color screen should show up, showing some version Info
- After that, a progress bar screen will be shown and the phone will reboot when finished
- Click "Finish" on the PC
- If you want to check if everything went fine, turn the device off (long power button press), then hold the "volume down" button and turn the device on again, still holding the "volume down" button until the 4-color screen shows up. It should read something like:
KOVS110
SPL-0.72.OliNex
MicroP1-787
MicroP2-707
- Remove and reinsert the battery to exit bootloader mode
Step 2 (Flashing ROMs)
download this first(english rom without debranding):
software for flashing ROMs (HardSPL & NBHUtil)
Before you start you have to -obviously- download and extract the ROM you want to flash. The file should be named *.image or *.nbh. Before you follow the steps, rename that file to Kovsimg.nbh.
- Format a MicroSD card with FAT32 if not yet done
- Copy the Kovsimg.nbh into the root directory of your MicroSD card and insert the card in your phone
- Turn off the phone (USB cable not attached)
- Remove and reinsert the battery
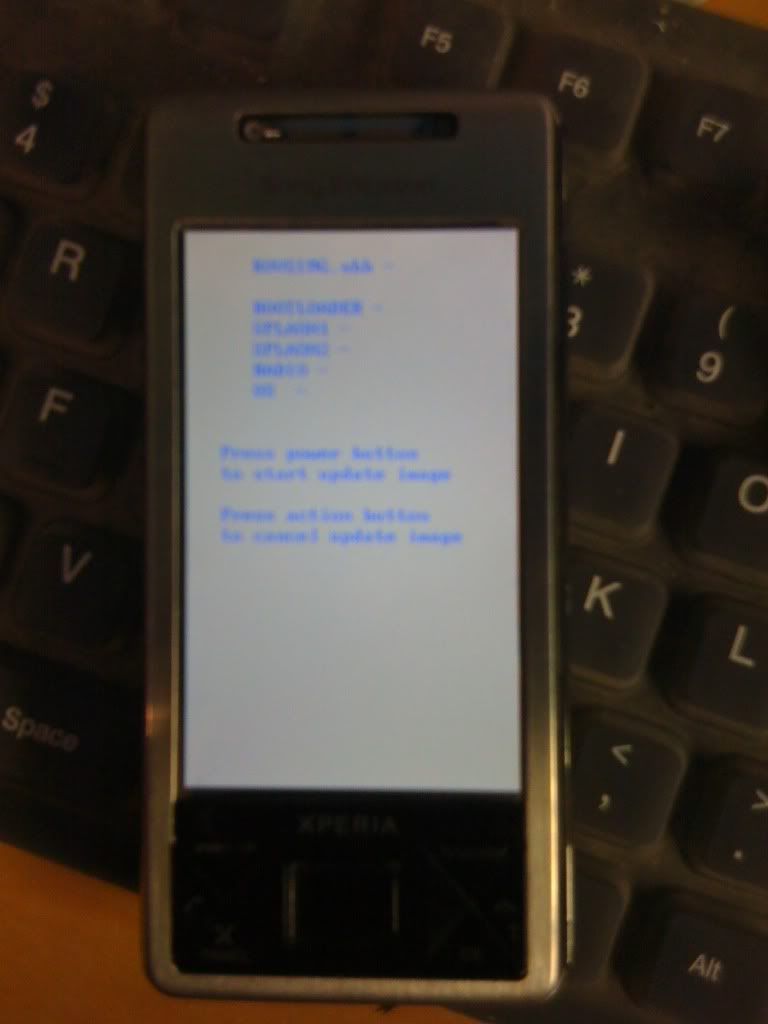
- Hold the volume down button and turn the device on again, still holding both buttons until the 4-color screen shows up.
- Follow the onscreen instructions
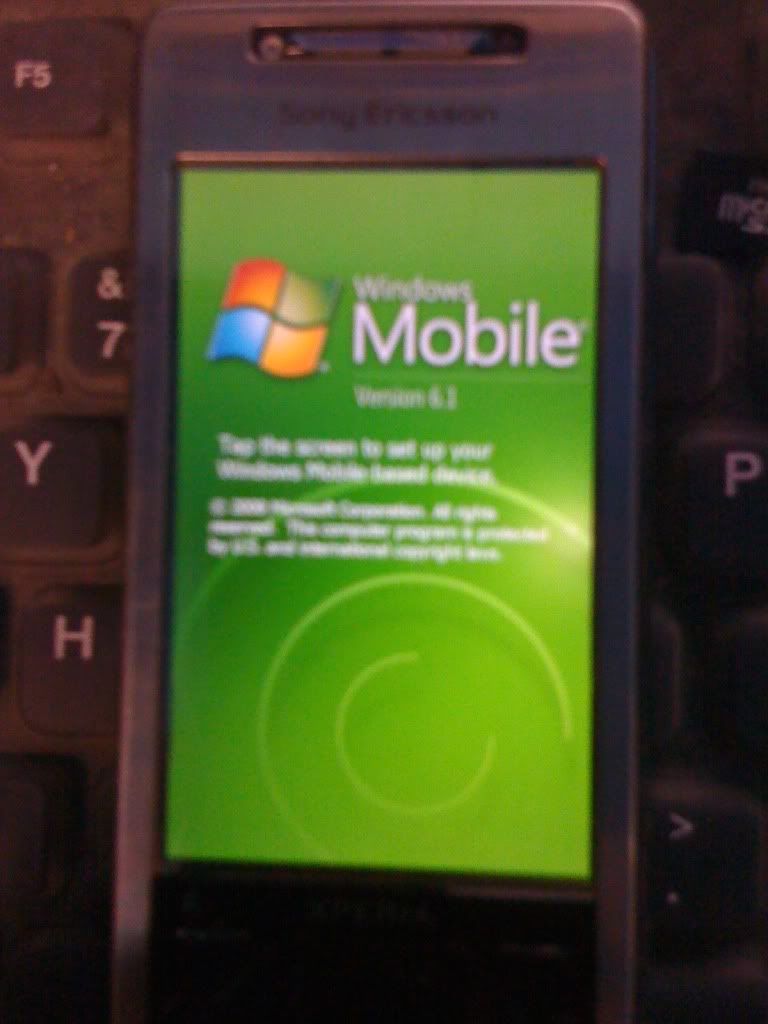
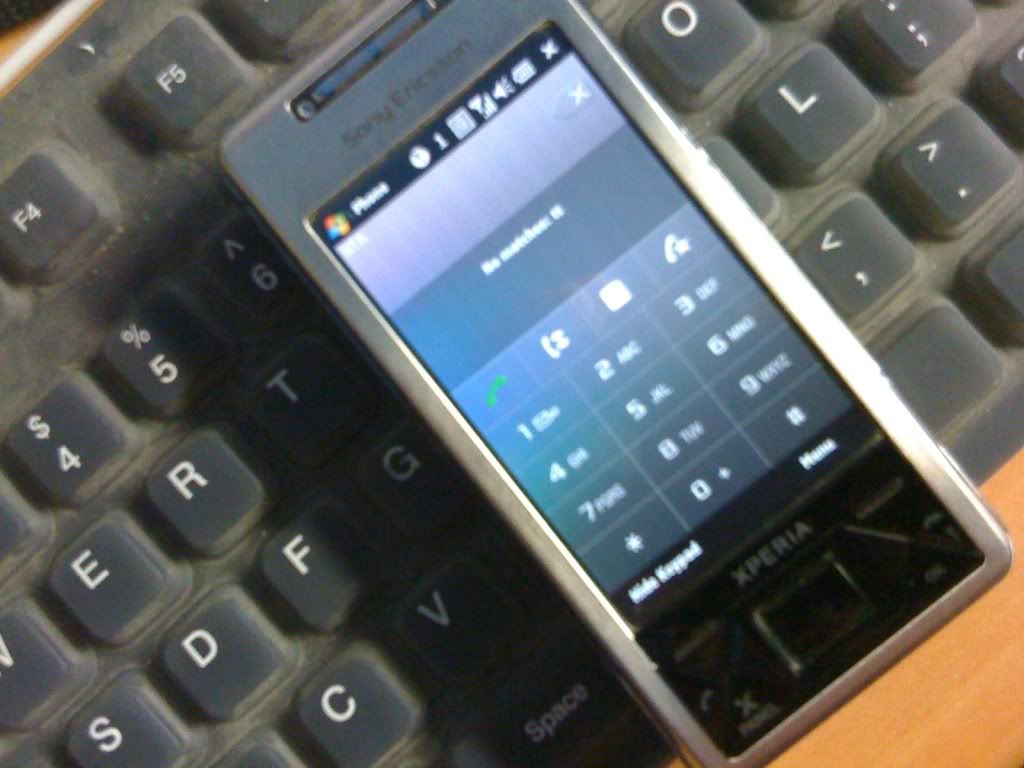
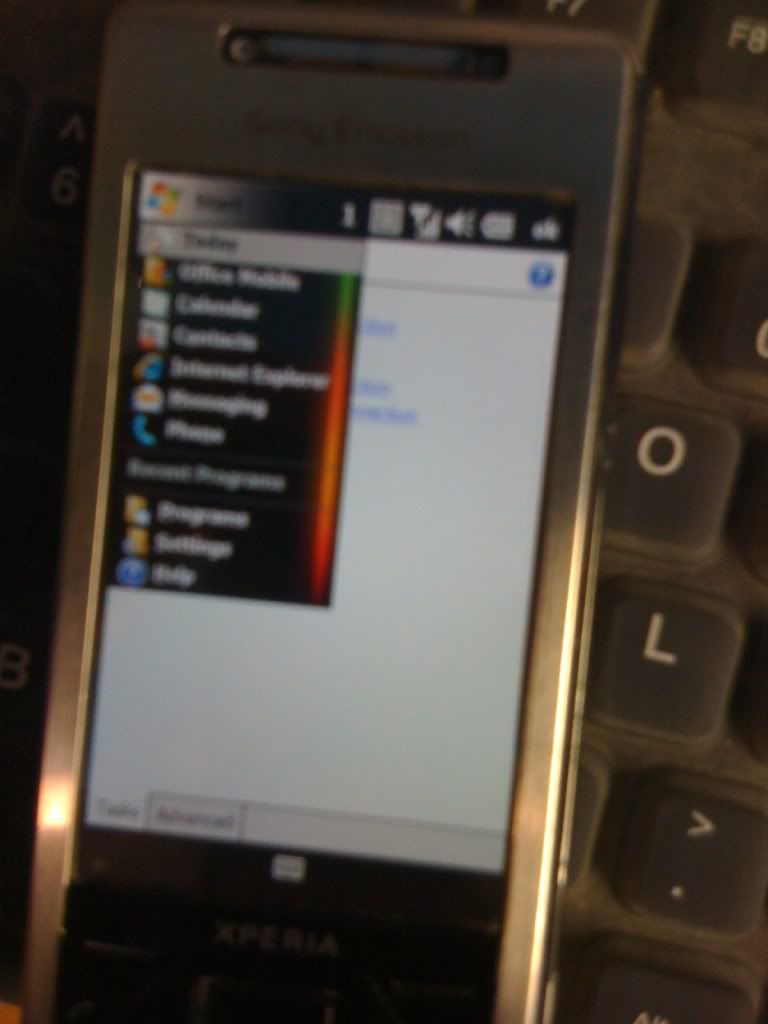
Congratulations. Youre done.
screen shot:


Steps
cable used: usb cable
solution:
Step 1 (Preparations)
- Download and install .NET Framework 3.5 SP1
- If you are using Vista, install the Mobile Device Center 6.1
- Set up the Active Sync (active sync 4.5 for XP) / Mobile Device Center (Vista) connection with your X1
- Charge the battery to at least 50% or more
- (Re)Connect the X1
- Run X1_HardSPL.exe
- Follow the instructions (it should say something like "Image Version: 1.02.111.7" to "1.00.X1")
- If asked, press "Yes" on the X1
- Now a 4-color screen should show up, showing some version Info
- After that, a progress bar screen will be shown and the phone will reboot when finished
- Click "Finish" on the PC
- If you want to check if everything went fine, turn the device off (long power button press), then hold the "volume down" button and turn the device on again, still holding the "volume down" button until the 4-color screen shows up. It should read something like:
KOVS110
SPL-0.72.OliNex
MicroP1-787
MicroP2-707
- Remove and reinsert the battery to exit bootloader mode
Step 2 (Flashing ROMs)
download this first(english rom without debranding):
software for flashing ROMs (HardSPL & NBHUtil)
Before you start you have to -obviously- download and extract the ROM you want to flash. The file should be named *.image or *.nbh. Before you follow the steps, rename that file to Kovsimg.nbh.
- Format a MicroSD card with FAT32 if not yet done
- Copy the Kovsimg.nbh into the root directory of your MicroSD card and insert the card in your phone
- Turn off the phone (USB cable not attached)
- Remove and reinsert the battery
- Hold the volume down button and turn the device on again, still holding both buttons until the 4-color screen shows up.
- Follow the onscreen instructions
Congratulations. Youre done.
screen shot:
Enjoy
MXBOX for blinking lights 100 Solution
 ;blinking led indicates HTI FW problem. Solution is update HTI.
- do not plug hti to pc
- install 3.5rev1.8
- open mobileex.exe, ignore no dongle detection
- press update HTI, plug HTI to usb immediately.
- proceed with driver installation after update FW is done
Nokia 5530 Handsfree Ic Jumper Solution 100 Tested
Nokia 5530 Xpress music handsfree Problem solution.


China Phone Repair Solution Pack
if you check it much give few comments about this so that others can learn form your comments also.
If you have any other Questions please do not hesitate to share with me.
nokia 1280 white lcd light problem solution here
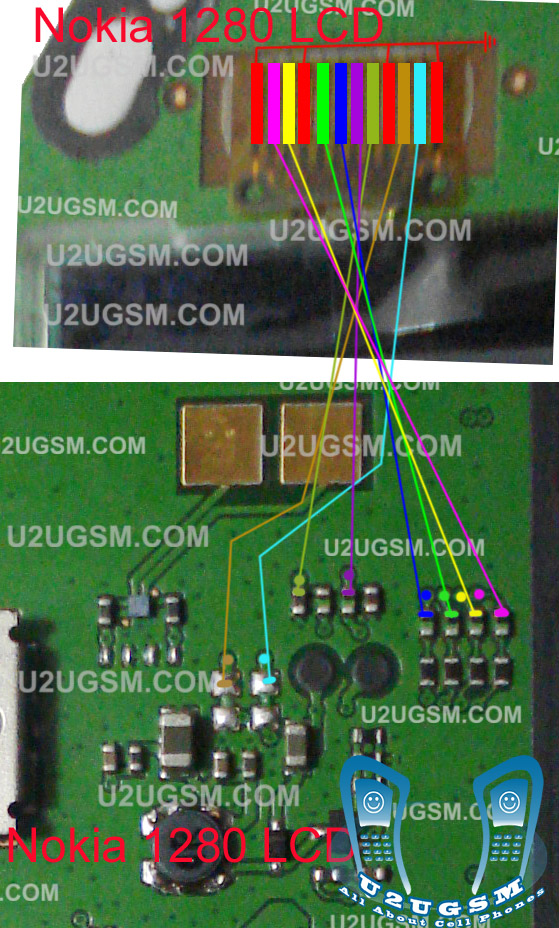
nokia 1280 white lcd light problem nokia 1280 white display solution nokia 1280 white display 1280 white lcd solution nokia 1280 lcd whit disply salosin nokia c101 whitdisply solution nokia 1280 white lcd solution nokia 1280 blak lcd solution Nokia 1280 white screen problem 1280 display solution nokia 1280 lcd white display, 
here is a diagram that will solve display problem in nokia 103 you can see all the links in diagram that goes to board from lcd jack.check all these prints and tracks with electronics meter and if any of them is broken make jumpers as shown.all these links are indicated with different colors so that can be identified easily.
here is a diagram that will solve display problem in nokia 103 you can see all the links in diagram that goes to board from lcd jack.check all these prints and tracks with electronics meter and if any of them is broken make jumpers as shown.all these links are indicated with different colors so that can be identified easily.
Thursday, August 28, 2014
Samsung I5500 Galaxy 5 Camera Not Working Solution

Nokia E73 Ringer Buzzer Speaker Jumper ways and Tracks
Nokia E73 Ringer - hands Free Speaker Problem Solution
Subscribe to:
Posts (Atom)