Showing posts with label and. Show all posts
Showing posts with label and. Show all posts
Friday, November 21, 2014
Nokia 108 RM 944 and RM 945 RX TX D D Usb Pinout

Nokia 108 RM-944 and RM-945 RX TX , D- D+ Usb Pinout
how to pinout pinout is a solutions for with out mobile
flash cable only TX RX and USB D- D+ and ground to flash and unlocking
the phone with soldering iron u need a cable for fbus
See the ufs and jaf box pinout

how to pinout pinout is a solutions for with out mobile
flash cable only tx rx and ground to flash and unlocking
the phone with soldering iron u need a cable for fbus
See the ufs and jaf box pinout

Nokia Lumia 800 Charging and Usb problem Solve

Nokia Lumia 800 Charging and Usb problem Solve
Thursday, November 20, 2014
Nokia 1800 1616 1280 L c d And Light Ways Solution 100 working

Nokia 1800 1616 1280 L c d And Light Ways Solution 100 working
Sunday, November 16, 2014
Nokia 2680s Restart And Hanging Problem Jumper Solution

Nokia 2680s Restart And Hanging Problem Jumper Solution
NOKIA N73 SPEAKER AND VIBRA WAYS

Saturday, November 15, 2014
Nokia 5700 White screen and Blue Screen Display Problem Solutions
If having tried to repair Nokia 5700 display problem issues and you installed a new LCD display module replacement on it but the problem still exists, This solution may help fix and repair Nokia 57000 display problem issues like white Lcd, blue Lcd, blank Lcd, garbled Lcd and other related display problem that is not caused by the LCD display module.

Nokia 5700 Display Problem solution

( white Lcd, blue Lcd and blank Lcd display repair)
There are two ESD-EMD filter is connected in the display circuits, If these ESD filter has been damaged it will result to display problem issues. Replacing it will possibly solved the display problem issues like white Lcd, blue Lcd, blank Lcd, garbled and saturated Lcd displays. Wednesday, November 12, 2014

Monday, October 27, 2014
Nokia X5 01 Menu Send Power ON OFF and Navigation keypad flex solution
This is a solution for nokia X5-01 upper keypad flex that is not working or functioning. If encountered a problem like the Send, Music, S60-L, Soft left, Soft right, Left, Right, Up, Down, Select and the End / power button keys that is not working this solution may possibly help fix the problem.
The following solution shows the flex keypad connection line paths for easy tracing and check up procedures. This can be also used to locate where and which components needs to be check and or where can apply and put a jumper when theres a line being cut or open due to wet or water damaged.
In troubleshooting upper keypads you must first visually check the flex assembly for possible damaged, scratched or cut. A damaged flexible cable wire assembly needs to be replaced a new replacement spare.
However, if there is only one key that is not working except the END/POWER key, you may refer this solution below for it shows the connection line paths of the upper keypad keys board on the flex assembly.
 The Send, Music, S60-L, Soft left, Soft right, Left, Right, Up, Down, Select and the End / power button keys connection used filter coils that is mounted or located at the back side of flex. If only one key is not working except the power key , you may first trace the corresponding line paths and filter coil connected to it, then just replace or mend to reconnect the open or cut line paths. If there is two or more keys that is not working you may suspect that the flex is already damaged it is because the solution shows that there are minimum of two certain keys shared in one line paths except the power on/off button.
The next solution below can be used for further upper keypad keys breakdown or failure. This solution can be used if the keypad flex is already been tried installing a new replacement flex ribbon wire, for it shows the complete connection line paths from the flex pin connector to the keypad filter IC solder ball bumps.

If already tried installing a new flex cable wire but still the keypads keys still doesnt work, you may need to replace the Keypad filter IC located or mounted near the Flex pin connector. You can also temporarily apply the jumper solution just to determine if all the connection line paths is working okay.
The following solution shows the flex keypad connection line paths for easy tracing and check up procedures. This can be also used to locate where and which components needs to be check and or where can apply and put a jumper when theres a line being cut or open due to wet or water damaged.
In troubleshooting upper keypads you must first visually check the flex assembly for possible damaged, scratched or cut. A damaged flexible cable wire assembly needs to be replaced a new replacement spare.
However, if there is only one key that is not working except the END/POWER key, you may refer this solution below for it shows the connection line paths of the upper keypad keys board on the flex assembly.
Nokia X5-01 Upper Keypad Flex Line Connection Tracks

The next solution below can be used for further upper keypad keys breakdown or failure. This solution can be used if the keypad flex is already been tried installing a new replacement flex ribbon wire, for it shows the complete connection line paths from the flex pin connector to the keypad filter IC solder ball bumps.
Nokia X5-01 Keypad IC jumper ways and pin connector line tracks

Download APN Backup Restore for Android and save APN settings

This app allows you to make a full export for APN settings, and after you’ll change the ROM, you will be able to restore-reinsert the correct APN settings.
APN Backup & Restore application for Android 4.0 ICE Cream Sandwich, have a special installation, you should install app as a system application, after you download the application, and you should place it on this location on your device SD card:
/sdcard/ApnBackupRestore
In another location if it is stored, the APN settings cannot be restore. First you need to backup, and the APN Backup & Restore will save your APN settings as an XML file. If you want to be sure that you back-up the correct APN stored value then only click ‘backup APNs’, this will save your APN settings, and now tap the menu button and after select ‘send by email’, in this step you should choose your email account and send your APN settings save to your Inbox email.
After the backup is done, when you complete a new custom ROM installation on your device you only need to click ‘Restore APNs’ and select from the options displayed the latest save. Also, you can alternatively to open your email, and if you already sent the APN save on your Inbox email, then you can very easy to download the specific file and place it on your internal SD card on your Android device.
The next step is to Open App Backup & Restore and loads the save APN settings.
The application is free to download and it is a perfect solution for restore the correct APN settings, and with this solution, after the custom ROM installation you will be able to connect on the internet.
Download App Backup & Restore for Android APK from here.
After install it on your device, confirm the installation and after that, you’ll be free to use it and save your APN carrier settings for your phone device based on Android Operating System.
Note: When you performing data wipe and factory reset actions exist a risk to loss of all important settings on your device, and with this application, you will prevent your device from browsing on the internet
Saturday, October 25, 2014
Nokia 2690 White Screen Blue and Blank Screen LCD Display Problem Solution
Heres a solution that may possibly help fix and repair Nokia 2690 LCD Display problems like white screen, blue screen, black or blank screen displays. If youre having tried to replace a new LCd display module replacement when trying to repair display problem on Nokia 2690 but nothing happens and the problem still exists. This solution below shows the connection of LCD display data signals from the application processor chip to each single pins of the LCD connector.Nokia 2710NE Keypad repair solution - keypad IC, flex and pin connector line tracks
 The solution above shows a detailed information of the display data signal being feeds from the application processor IC to the LCD display pin connector. Each line is been filtered by a resistor that has resistance value of 33ohms each. You may check each resistor and trace each particular line paths, replace the resistor if found damaged or by then apply a jumper for an open line or cut connections.
Read More..
2690 LCD display connection line tracks ( display jumper ways)

Thursday, October 23, 2014
Blackberry 8320 short solution and no light solution
blackberry 8320 shot solution fast try to basic full wash board not working see this solution this one solution working 100% see this ,blackberry no light solution ,blackberry lcd light not working solution ,blackberry 8320 lcd light not working only jumper 100% working solution ,blackberry full shot dead solution here ,blackberry shot no light solution
blackberry 8310 Short circuit Solution 100% tested solution

if u need shot solution try this i hope solve your mobile phone shot and lcd light solution many time tested me this solution .
Wednesday, October 22, 2014
Android Smartphone and Tablet Users Complete Data Backup Guide
Complete Data Backup Guide for Android Smartphone and Tablet Users,Data Backup is one of the most important task whether you using computer or mobile devices. We used to backup all our import documents before reinstalling our computer operating system or, before making a huge change in the system settings. Like computers, today’s advance mobile devices allow us to store a huge number of data and we used to keep our important data stores in our mobile device to access on the go. Besides all those important data, mobile devices have other valuable data and settings such asandroidsbd.com- Contacts, Call Logs, SMS and MMS, WiFi Settings, APN Settings, Passwords, Various Downloaded Apps and Games and much more. More over we have personalized calendar settings, work schedule and more.In this article we going to describe complete data backup guide for android Smartphone and tablet users. Data backup should be done occasionally as you never know when your device will stop working for any reason. Suppose you have made change in mobile system settings or install an unknown apps but after that your phone get hangs and stuck in boot loop. If it happen, then you have to do complete wipe your phone and that surely you going to loss all your data. So, it is better to do schedule backup your mobile data.For data backup, all most all Android Smartphone comes with basic data backup option but that only able to backup normal data like Contacts, WiFi Settings, Passwords etc but can’t backup SMS, MMS and other important data. If you have a rooted android device and occasionally experience custom ROM then you can easily do a nandroid backup through CWM Recovery or TWRP Recovery which backup almost everything stores in your phone. Others can use various data backup apps which available from the Google Play Store but most of the good apps works with rooted android phone. So, many android users search for how to backup data and settings without rooting android phone.
Also Read: Download USB Driver for Android Devices
In this article, we going to share some of the great free android data backup and restore apps that work with non rooted android phone. Backup all your Contacts, Call Logs, Messages, WiFi and APN Settings, Apps and Games in external memory and restore later when you require. Check out all the below data backup apps for un-rooted android phone.
 Free Download Backup Your Mobile from Google Play Store
 Free Download Easy Backup from Google Play Store
 Free Download Go Backup and Restore Pro from Google Play Store
 Free Download JS Backup from Google Play store
Also Read: Download USB Driver for Android Devices
In this article, we going to share some of the great free android data backup and restore apps that work with non rooted android phone. Backup all your Contacts, Call Logs, Messages, WiFi and APN Settings, Apps and Games in external memory and restore later when you require. Check out all the below data backup apps for un-rooted android phone.
Backup Your Mobile App
Backup Your Mobile is a kind of all in one android data backup app which available for free download from the Google Play Store. Backup all your phone Contacts, complete call logs, SMS and MMS, various system settings, WiFi and APN settings, bookmark and browser history, passwords and settings, User dictionary, calendar events, games and other apps. backup can be done either in SD card or in system memory. The app also allow to store backup data to Google Drive or Drop Box. Backup manually or you can schedule an automatic backup.Easy Backup App
Easy Backup do as its name, Another great all in one free data backup app for non rooted android phone. Easily backup all your phone data like- contacts, messages, call logs, WiFi settings, APN settings, browser passwords and bookmarks, calendar schedule, games and rest of all. Like the above app, you can store the backup file in system memory or in SD Card and even you can store backup data to Google Mail, Google Drive and Drop Box. Do a manual backup or schedule automatic backup. More over, you can view backup content and even you can mail backup file.Go Backup and Restore Pro App
Go Backup and Restore Pro is a great professional free version of data backup and restore app for android phone. The app helps to backup important phone data such as- contacts, call logs, messages both SMS and MMS, system settings, apk files, app data and more. As this is a free version, there is some limitation of this app. You can store the backup file to your SD card but the free version not allow to store file to online media like Google Drive or Drop Box. You can do only manual backup as the schedule backup is not available in this free version.JS Backup App
JS Backup is another easy backup and restore app for non rooted android phone which is again available for free from Google Play Store. The app allow easy backup of almost everything that store in your phone such as- contacts, call logs, messages, passwords, WiFi and APN settings, calendar settings, alarms, events, images, videos, music, play lists, apps, dictionary, bookmarks and more. Like all other great app, the JS Backup allow to store backup file in SD card and as well as cloud storage to Google Drive, Drop Box and SugarSync. The CSV format backup file van be open through MS Excel or other supported application.App Backup and Restore App
As the name stated, the App Backup and Restore is a special free app to backup all the apps that installed on your phone. With the help of this app you can backup all your third party app that installed on your non rooted android Smartphone or tablet. However, as the app works with non rooted android phone, you can only backup .apk file but not app data. Store backup file to SD card. Along with third party app, you can also backup system defaults app but for that you have enable option from app setting.Saturday, October 18, 2014
Nokia 2323 Classic Bluetooth and FM Not working Problem Solution
In Nokia 2323 Classic Bluetooth is used for data transfer between devices with Bluetooth.In Nokia 2323 Classic Bluetooth can be damage or not working due to water damages and rust.It can be fault for shortage and burned parts Nokia C2-01 Mic problem solution jumper ways

In above diagram you can see some parts that are in lined with red color. Clean these parts after disassemble with electronics cleaner and then apply some hot ait so that it can be dry.Do not apply much air with hot air station because it can harm your skin or may can damage the mother board of Nokia 2323 Classic.
These parts are also used in FM function so if FM Radio is not working in Nokia 2323 Classic you can also re flow and resold these parts that are identify in the above diagram.
for more detail and new tips and tricks about cellphone service problem keep visiting this page we will update cellphone service diagrams timely with new cellphone diagrams.some related post are also given bellow you can read them also for more information about cellphone.
In above diagram you can see some parts that are in lined with red color. Clean these parts after disassemble with electronics cleaner and then apply some hot ait so that it can be dry.Do not apply much air with hot air station because it can harm your skin or may can damage the mother board of Nokia 2323 Classic.
These parts are also used in FM function so if FM Radio is not working in Nokia 2323 Classic you can also re flow and resold these parts that are identify in the above diagram.
for more detail and new tips and tricks about cellphone service problem keep visiting this page we will update cellphone service diagrams timely with new cellphone diagrams.some related post are also given bellow you can read them also for more information about cellphone.
Friday, October 17, 2014
Sony Xperia Z2 Tips and Tricks How Tos
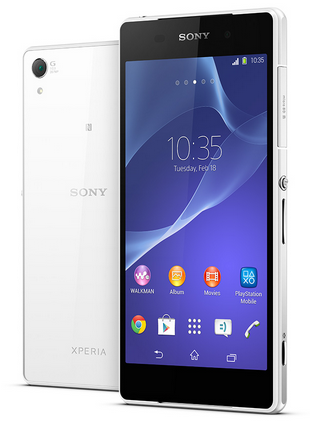
Here are some tricks for your Sony Xperia Z2. Visit this site more often for updates and some tips. You can also submit your concern at our contact us form on the sidebar. If your device is not listed on this site and you are having problems with it. Dont hesitate to contact us, we will try to respond on your emails within 24-hours.
Why do I need a Google™ account?
Your Xperia™ device from Sony runs on the Android™ platform developed by Google™. A range of Google™ applications and services is available on your device when you purchase it, for example, Gmail™, Google Maps™, YouTube™ and Google Play™, the online store for downloading Android™ applications. To get the most out of these services, you need a Google™ account. For example, a Google™ account is mandatory if you want to:
• Download and install applications from Google Play™.
• Synchronise email, contacts and the calendar.
• Chat with friends using the Hangouts™ application.
• Synchronise your browsing history and bookmarks.
To set up a Google™ account on your device
1. From your Home Lcd, tap Apps icon.
2. Find and tap Settings > Add account > Google.
3. Follow the registration wizard to create a Google™ account, or sign in if you already have an account.
How to Factory Reset
We have our own reasons why we factory reset our device. Maybe we want to delete all the files and restore the device to its original state. It could also be the device may be malfunctioning or so slow and it needs to be reset.
Restoring the default settings or factory reset your device will delete all your files. It is recommended to backup your important files on your computer before attempting to reset your device.
There are two ways on how to reset your Sony Xperia Z2. One is to erase everything, wiping your files and restoring the default settings. The other one is to reset the device without deleting your personal data.
How To Reset (Erasing All Your Files):
- On your Home Lcd, tap Apps icon.
- Go to Settings, and select Backup & reset.
- Tap on Factory data reset.
- Then Reset phone.
- Confirm by tapping Erase everything. You just need to wait while your phone deleting your files and restoring your settings to default.
How To Reset Without Erasing Your Personal Data:
- On your Home Lcd, tap Apps icon.
- Go to Settings, and select Backup & reset.
- Tap on Settings reset.
- Then Reset phone.
- Confirm by tapping Reset settings.
- Wait while your phone restoring your settings.
Warning: To avoid permanent damage to your device, do not restart your device while a reset procedure is underway.
How to Set Up Voicemail Service
Voicemail services depends on your subscription plan with your service provider. This feature allows caller to leave voice messages on your phone whenever you cant pick up. Your voicemail number may be found on your sim card or you can get it directly from your service provider. Here are the steps to set up voicemail service on Sony Xperia Z2.
To set up your voicemail number:
1. On your devices homeLcd, tap on Apps icon to enter your voicemail number.
2. Go to Settings menu.
3. Select Call Settings and choose Voicemail Settings.
4. Tap on Voicemail number so you can enter your designated voicemail service number.
5. And lastly tap on OK.
To call your voicemail service number:
1. On your homeLcd, tap on the Apps icon.
2.Look for Phone and tap it.
3. And touch and hold for seconds the number 1.
Voicemail services depends on your subscription plan with your service provider. This feature allows caller to leave voice messages on your phone whenever you cant pick up. Your voicemail number may be found on your sim card or you can get it directly from your service provider. Here are the steps to set up voicemail service on Sony Xperia Z2.
To set up your voicemail number:
1. On your devices homeLcd, tap on Apps icon
to enter your voicemail number.2. Go to Settings menu.
3. Select Call Settings and choose Voicemail Settings.
4. Tap on Voicemail number so you can enter your designated voicemail service number.
5. And lastly tap on OK.
To call your voicemail service number:
1. On your homeLcd, tap on the Apps icon
.2.Look for Phone and tap it.
3. And touch and hold for seconds the number 1.
Battery Life depends on how you use your device. For your device, if you want to save your battery to last longer hours, you may need to adjust your settings. Follow these suggestions:
• Turn on the power-saving option on the device. Then lessen the Lcd brightness and the Lcd lock timeout. On the HomeLcd, tap on Apps icon. Select Settings > Power management.
- Use the Stamina mode and Low battery mode features.
- To activate the STAMINA mode: While you are in the Power management, tap on Point icon next to STAMINA mode, then tap Activate.
• Turn down your device volume with the volume keys.
• Close any apps or features when you are done using it so they will not continuously running in the background.
• Turn off the network connection if you are out of range so that your device will stop searching for a network signal. To turn off the network go to Settings and turn off the Bluetooth and Wi-Fi.
• You should use the latest version of the software update. Software updates improves some features and fixes some bugs on the previous software version.
• Adjust your brightness level to low.
• Turn off the camera flash.
• If you have any live wallpaper, Disable it.
• Set the synchronization application to manual. You can also choose the automatic, but increase the synchronization intervals.
• If you want to listen to music, use the Sony original hands free device. It demand less battery power than your devices own loudspeakers.
Wouldnt it be nice if youre phone automatically plays your song list right when you step in your car? Or what about letting you show your whole day agenda the moment you arrive at your work table between 8-9am? These are just examples on how Sony Xperia Z2s Smart Connect app works. With this app, you can set an event to happen on your device at certain times or what will happen when you connect/disconnect accessories like headset or charger. Hereshow to use it.
1. On your devices home Lcd, tap on Apps icon
2. Look for Smart Connect and tap on it.
3. If its your first time opening the said app, tap on OK to close the introduction Lcd.
4. Go to Events tab and tap on the plus (+) icon.
5. If you are creating an event for the first time, tap OK again to close the introduction Lcd.
6. Add conditions under which you want to trigger the event. A condition could be the connection with an accessory, or a specific time interval, or both.
7. Tap Right Arrow icon to continue.
8. Add what you want to happen when you connect an accessory, and set other settings as desired.
9. Tap Right Arrow icon to continue.
10. Set an event name, then tap Finish.
Transferring files in Sony Xperia Z2 is now made easy by using the Media Transfer Mode. You can easily transfer files between your device and other MTP compatible devices such as computer, using a Wi-Fi connection. But before you can transfer files wirelessly, you will need to pair both devices.
Note: You will need a Wi-Fi enabled devices that supports Media transfer such as a computer running Microsoft, Windows Vista orWindows 7.
To pair your device with the computer:
- Check if the media transfer mode of your device is enabled. It is normally enabled by default.
- Using the USB cable, connect your device to a computer.
- On your computer, once the name of your device appear, click on Network Configuration and just follow the steps on how to pair the computer.
- After pairing, safely disconnect your device from your computer.
These steps will work only on Windows 7 OS and the computer is connected to the Wi-Fi Access point via network cable.
To connect paired devices wirelessly in Media Transfer Mode:
- First things first, check if the media transfer mode is enabled.
- On your Home Lcd, tap on the Apps icon.
- Select Settings > Xperia > USB connectivity.
- Then tap the paired device that you want to connect to under Trusted devices.
- Tap connect.
If you want to disconnect, just tap on the paired device and tap Disconnect.
If you want to remove the paired device, tap on the paired device you want to remove and select Forget.
How to Add a Shortcut on HomeLcd
Just like a desktop, it also works best on any smartphones to add a shortcut on a homeLcd. This r somehow makes navigation, especially to important files/apps, more accessible. Its less hassle and less tapping. Sony Xperia Z2 definitely allows you to make your device experience stress-free by adding a shortcut to important apps on your homeLcd. Heres how to do it.
1. On your devices homeLcd, touch and hold and empty area until the device vibrates.
2. After doing so, tap on Apps.
3. Then go to Shortcuts and select a shortcut.
4. Or another option, just go directly to the Application Lcd and touch and hold the application.
Adding Widgets on your HomeLcd will help you improve your productivity in using your Sony Xperia Z2. If you dont know what widgets means, Widgets are small applications that you can directly use on your HomeLcd. These will serve as your shortcut icon so will no longer need to access your Apps.
Follow these steps on how to add widgets on your HomeLcd.
- Tap and hold an empty area on your Home Lcd until your device vibrates.
- There should an option appear, tap on Widgets.
- Select the widget and tap on it you want to add.
- There are some widgets that are resizeable, you can expand them to view the content more on your HomeLcd.
How to resize a Widget:
- Tap and hold the widget you want to resize until it magnifies and the device vibrates. You can tell if the widget is resizeable if the highlighted frame and resizing dots appear.
- You just need to Drag the dots for your preferred size.
- Then tap anywhere on the HomeLcd to confirm the new size of the widget.
How to Change Time & Date
In some devices you can only change the Timezone and not the specific time and date. But in Sony Xperia Z2, you have an option whether to set the time in automatic or to manually set the time.
Follow these steps on how to change the time and date on your device:
To manually set the date:
- On your Home Lcd, tap the Apps icon.
- Select Settings, then tap Date & Time.
- You need to uncheck the Automatic date & time. If it is set to automatic.
- Then tap on Set date, and adjust the date by scrolling up and down.
- To confirm the changes, tap Done.
To manually set the time:
- On your Home Lcd, tap the Apps icon.
- Select Settings, then tap Date & Time.
- You need to uncheck the Automatic date & time. If it is set to automatic.
- Then tap on Set time, and adjust the time by scrolling up and down.
- To confirm the changes, tap Done.
If you want to change the timezone:
- On your Home Lcd, tap the Apps icon.
- Select Settings, then tap Date & Time.
- You need to uncheck the Automatic date & time. If it is set to automatic.
- Then tap on Select time zone.
- Find your preferred time zone in the option.
Duplicate contacts usually happens when you import your old contacts to your new device or when you synchronize your contacts with the other account. On your Sony Xperia Z2, you can avoid dupicate contacts and instead link these two to create a single entry. If you happen to link two contacts by mistake, you can separate them again. Heres how you can link two contacts.
1. On your devices homeLcd, tap on
 .
.2. Tap on
 and tap the contact you want to link with another contact.
3. Press on
 and tap Link contact.
4. And tap the contact whose information you want to be linked with the first one. Tap OK to confirm. The first contact no longer appears on your contact list but is merged with the second contact.
Now if you mistakenly linked two contacts
on your homeLcd and then tap on.2. Then tap on the linked contact you want to edit.
3. And tap on
 . Tap on Unlink contact on the list and tap on OK to confirm.
How to Transfer Contacts from Sim Card or Memory Card
Contacts is very important for everyone of us. We cant connect to our friends without a contact number. If you have a new phone, saving contacts on the phone one by one is so hassle. But if you have save your contacts on a Sim Card or Memory Card, then you can transfer your contacts from your SIM Card or Memory Card to your Sony Xperia Z2.
How to transfer contacts from a SIM card to your device:
- On your devices homeLcd, tap on the Apps icon .
- Then tap on the Person icon or Contacts.
- Press the Three Vertical Dots, and select Import contacts > SIM card.
- If you have set up a synchronization account, then you can choose to add the SIM card contacts under that account. Or you may choose to only use the contacts on your device.
- If you want to import all the contacts, tap Import all.
- If you want to select which contact to transfer, you just need to find and tap on the contact.
How to transfer contacts from a memory card to your device:
- On your devices homeLcd, tap on the Apps icon .
- Then tap on the Person icon or Contacts.
- Press the Three Vertical Dots, and select Import contacts > SD card.
- Choose the option you preferred if you have set up a synchronization account. Whether to add the imported contacts under that account or on your device.
- If you have more than one vCard file on the SD card, there should be a list appear on the different batches of contacts. Just select the batch you want to import.
How to Import Contacts From Old Phone to New Phone (on Sony, iPhone, Samsung, HTC and Nokia)
Contacts is very important for everyone of us. We cant connect to our friends without a contact number. If you have a new phone, saving contacts on the phone one by one is so hassle. But now, theres an easy way how to transfer or import your contacts from your old phone to your new phone.
Use your PC to transfer contacts to your new phone. This process is applicable in several phone brands, including iPhone, Samsung, HTC and Nokia.
You just need an Internet Connection on your PC, your old and new phone and their own USB cable.
If you are not prompted with a pop-up window to install the PC Companion, you can also download the PC Companion here.
How to Screen Mirror to Show the Screen on a TV
The Screen Mirroring will allow you to show the Lcd of your device on a TV or other large display using a cable connection or wirelessly using a Wi-Fi. It uses the Wi-Fi Direct technology that create a wireless connection between two devices. You can also use this feature to listen to music from your phone via the TVs speakers.
Mirroring the Lcd of your device on a TV using a cable:
You can connect your device to a TV set using an MHL cable or a HDMI cable and view content saved in your device on the TV Lcd. When you connect your device in this way to a compatible TV set, the TV launcher application opens. This application helps you to play media files from your device on TVs and other devices.
Note: You may have to purchase a cable and an adaptor separately.
To view content from your device on a TV which supports MHL input
1. Connect your device to the TV using an MHL cable. MHL iconappears in your devices status bar after a connection is established.
2. The TV launcher application starts automatically. Follow the instructions to view your media files on the TV.
To view content from your device on a TV which supports HDMI™ input
1. Connect your device to an MHL adaptor, and connect the adaptor to a USB power supply.
2. Connect the adaptor to a TV using a HDMI™ cable. appears in your devices status bar after a connection is established.
3. The TV launcher application starts automatically. Follow the instructions to view your media files on the TV.
To view help about using the TV remote control
1. While your device is connected to the TV set, drag the status bar downwards to open the Notification panel.
2. Tap MHL connected.
Note: You can also press the yellow button on the TV remote control to open the Notification panel.
To disconnect your device from the TV set
• Disconnect the MHL™ cable or the MHL adaptor from your device.
How to Mirror the Lcd of your device wirelessly on a TV
You can use Screen mirroring feature to show the Lcd of your device on a TV or other large display without using a cable connection.
Warning: Your TV must support Lcd mirroring based on Wi-Fi CERTIFIED Miracast™ for the functionality described above to work. If your TV does not support Lcd mirroring, you may need to purchase a wireless display adapter separately.
Warning: When using Lcd mirroring, the image quality may sometimes be negatively impacted if there is interference from other Wi-Fi® networks.
To mirror the Lcd of your device on a TV Lcd
1. TV: Follow the instructions in the User guide for your TV to turn on the Lcd mirroring function.
2. Your device: From your Home Lcd, tap Apps icon.
3. Find and tap Settings > Xperia™ Connectivity > Screen mirroring.
4. Tap Turn on Screen mirroring and select the device to which you want to mirror content.
Warning: When using Lcd mirroring, do not cover the Wi-Fi antenna area of your device.
Warning: Your TV must support Lcd mirroring based on Wi-Fi CERTIFIED Miracast™ for the functionality described above to work.
How to Activate Camera App and Play Tracks on a LockLcd
LockLcds dont normally allow users to launch any apps or even take photos. We still need to unlock our Lcds to use certain apps on our handset. But with your device, you can take photos, record videos and play tracks without unlocking the Lcd.
To take a photo on a lockLcd
1. Activate first your Lcd by briefly pressing the power key
2. Now activ the camera app by dragging the camera icon to the left across the Lcd.
3. And tap to take photos or record videos without unlocking your Lcd.
To play an audio on a lockLcd
1. Activate first your Lcd by briefly pressing the power key.
2. Now to display the music player controls, drag to the right across the Lcd.
3. And tap to play a track on a lockLcd.
To pause an audio track from the lockLcd
1. Activate first your Lcd by briefly pressing the power key.
2. When the music player controls appear, tap to pause the track.
To change the currently playing audio track on a lockLcd
1. Activate first your Lcd by briefly pressing the power key.
2. Then tap or
or when the music player controls appear.
How to Use NFC | Share Contacts, Music Files, Photo or Video and Web Address
To share a music file with another device using NFC
1. Make sure that both your device and the receiving device have the NFC function turned on, and that both Lcds are active.
2. To open the "WALKMAN™" application, tap Apps icon, then find and tap Walkman icon.
3. Select a music category and browse to the track you want to share.
4. Tap the track to play it. You can then tap Pause icon to pause the track. The transfer works whether the track is playing or paused.
5. Hold your device and the receiving device back to back so that the NFC detection areas of each device touch each other. When the devices connect, a thumbnail of the track appears.
6. Tap the thumbnail to start the transfer.
7. When the transfer is done, the music file plays immediately on the receiving device. At the same time, the file is saved on the receiving device.
To share a photo or video with another device using NFC
1. Make sure that both devices have the NFC function turned on, and that both Lcds are active.
2. To view photos and videos in your device, go to your Home Lcd, tap Apps icon, then find and tap Album.
3. Tap the photo or video that you want to share.
4. Hold your device and the receiving device back to back so that the NFC detection areas of each device touch each other. When the devices connect, a thumbnail of the track appears.
5. Tap the thumbnail to start the transfer.
6. When the transfer is done, the photo or video is displayed on the Lcd of the receiving device. At the same time, the item is saved on the receiving device.
To share a web address with another device using NFC
1. Make sure that both devices have the NFC function turned on, and that both Lcds are active.
2. From your Home Lcd, tap Apps icon.
3. To open the web browser, find and tap Chrome browser icon.
4. Load the web page that you want to share.
5. Hold your device and the receiving device back to back so that the NFC detection areas of each device touch each other. When the devices connect, a thumbnail of the track appears.
6. Tap the thumbnail to start the transfer.
7. When the transfer is done, the web page is displayed on the Lcd of the receiving device.
How to Hard Reset
We have our own reasons why we hard reset our device. Maybe we want to delete all the files and restore the device to its original state. It could also be the device may be malfunctioning or so slow and it needs to be reset.
Restoring the default settings or factory reset your Sony Xperia Z2 will delete all your existing files. It is recommended to backup your important files on your computer before attempting to reset your device.
1. Sony made a special button, just by pressing it your device will reset to default or to its original state.
2. You can find the Hard Reset button under the flap cover of MicroSD card slot on your Xperia Z2.
3. Just use a thick or moderate pen, or any object that will fit to the hole to press it.
Use this method if your device is frozen or unable to solve by Factory Reset.
Application Lcd
The Application Lcd, which you open from the Home Lcd, contains the applications that come pre-installed on your device as well as applications that you download.
To view all applications on the Application Lcd
1. From your Home Lcd, tap Apps icon .
2. Flick left or right on the Application Lcd.
To open an application from the Application Lcd
• Flick left or right to find the application, and then tap the application.
To open the Application Lcd menu
• When the Application Lcd is open, drag the left edge of the Lcd to the right.
To move an application on the Application Lcd
1. To open the Application Lcd menu, drag the left edge of the Application Lcd to the right.
2. Make sure that Own order is selected under SHOW APPS.
3. Touch and hold the application until it magnifies and the device vibrates, then drag it to the new location.
To add an application shortcut to the Home Lcd
1. From the Application Lcd, touch and hold an application icon until the Lcd vibrates, then drag the icon to the top of the Lcd. The Home Lcd opens.
2. Drag the icon to the desired location on the Home Lcd, then release your finger.
To arrange applications on the Application Lcd
1. To open the Application Lcd menu, drag the left edge of the Application Lcd to the right.
2. Select the desired option under SHOW APPS.
To search for an application from the Application Lcd
1. To open the Application Lcd menu, drag the left edge of the Application Lcd to the right.
2. Tap Search apps.
3. Enter the name of the application that you want to search for.
To uninstall an application from the Application Lcd
1. To open the Application Lcd menu, drag the left edge of the Application Lcd to the right.
2. Tap Uninstall. All uninstallable applications are indicated by X mark.
3. Tap the application that you want to uninstall, then tap Uninstall.
Shortcuts and folders
Use shortcuts and folders to manage your applications and keep your Home Lcd tidy.
To add a shortcut to your Home Lcd
1. Touch and hold an empty area on your Home Lcd until the device vibrates and the customisation menu appears.
2. In the customisation menu, tap Apps.
3. Scroll through the list of applications and select an application. The selected application gets added to the Home Lcd.
In step 3, alternatively, you can tap Shortcuts and then select an application from the list available. If you use this method to add shortcuts, some of the applications available allow you to add specific functionality to the shortcut.
To move an item on the Home Lcd
• Touch and hold the item until it magnifies and the device vibrates, then drag the item to the new location.
To delete an item from the Home Lcd
• Touch and hold an item until it magnifies and the device vibrates, then drag the item to Trash bin icon.
To create a folder on the Home Lcd
• Touch and hold an application icon or a shortcut until it magnifies and the device vibrates, then drag and drop it on top of another application icon or shortcut.
To add items to a folder on the Home Lcd
• Touch and hold an item until it magnifies and the device vibrates, then drag the item to the folder.
To rename a folder on the Home Lcd
1. Tap the folder to open it.
2. Tap the folders title bar to show the Folder name field.
3. Enter the new folder name and tap Done.
How to Share Content with DLNA Certified Devices
You can view or play media content saved to your device on other devices such as, for example, a TV, or a computer. Such devices must be DLNA Certified™ by the Digital Living Network Alliance and all devices must be connected to the same Wi-Fi® network in order for content to be shared. You can also view or play content from other DLNA Certified™ devices on your device.
After you set up the sharing of content between devices, you can, for example, listen to music files stored on your home computer from your device, or view photos taken with your devices camera on a large-Lcd TV.
Playing files from DLNA Certified™ devices on your device
When you play files from another DLNA Certified™ device on your device, this other device acts as a server. In other words, it shares content over a network. The server device must have its content sharing function enabled and give access permission to your device. It also must be connected to the same Wi-Fi® network as your device.
To play a shared track on your device
1. Make sure the devices that you want to share files with are connected to the same Wi-Fi® network as your device.
2. From your Home Lcd, tap Apps icon, then find and tap WALKMAN.
3. Select a device from the list of connected devices.
4. Browse the folders of the connected device and select the track that you want to play. The track starts playing automatically.
To play a shared video on your device
1. Make sure the devices that you want to share files with are connected to the same Wi-Fi® network as your device.
2. From your Home Lcd, tap Apps icon, then find and tap Movies.
3. Select a device from the list of connected devices.
4. Browse the folders of the connected device and select the video that you want to play.
To view a shared photo on your device
1. Make sure the devices that you want to share files with are connected to the same Wi-Fi® network as your device.
2. From your Home Lcd, tap Apps icon.
3. Find and tap Album > My albums. All your available online albums and connected devices are displayed.
4. Select a device from the list of connected devices.
5. Browse the folders of the connected device and select a photo to view it.
Preparing to play content from your device on DLNA Certified™ devices
You must set up file sharing on your device first before you can view or play media files from other DLNA Certified devices. Your device works as a media server when it makes content available to client devices. When you set up file sharing on your device, you must also give access permission to client devices. After you do so, such devices appear as registered devices. Devices that are waiting for access permission are listed as pending devices.
To stop sharing files with other DLNA Certified™ devices
1. From your Home Lcd, tap Apps icon.
2. Find and tap Settings > Xperia™ Connectivity > Media server settings.
To set access permissions for a pending device
1. From your Home Lcd, tap Apps icon.
2. Find and tap Settings > Xperia™ Connectivity > Media server settings.
3. Select a device from the Pending devices list.
4. Select an access permission level.
To change the name of a registered device
1. From your Home Lcd, tap .
2. Find and tap Settings > Xperia™ Connectivity > Media server settings.
3. Select a device from the Registered devices list, then select Change name.
4. Enter a new name for the device.
To change the access level of a registered device
1. From your Home Lcd, tap Apps icon.
2. Find and tap Settings > Xperia™ Connectivity > Media server settings.
3. Select a device from the Registered devices list.
4. Tap Change access level and select an option.
To get help about sharing content with other DLNA Certified™ devices
1. From your Home Lcd, tap Apps icon.
2. Find and tap Settings > Xperia™ Connectivity > Media server settings.
3. Tap Question mark icon.
How to Use Car Infotainment System
Connect your device to a MirrorLink™ certified car infotainment system using a USB cable to, for example, use a navigation app or play music from your device while driving. The car infotainment system mirrors all features on your device and gives you access to all applications. When connected, you can navigate the apps using the car infotainment system controls.
Some applications may not be available in driving mode. Also, protected data, such as videos that are strictly protected under Digital Rights Management (DRM), is not made available via MirrorLink™.
To connect your device to a car infotainment system
• Connect your device and the car infotainment system using a USB cable. The Lcd of your device appears on the Lcd of the infotainment system.
Warning: You may need to start MirrorLink™ manually if the connection between your device and the infotainment system is not established automatically.
To start MirrorLink™ manually
1. Make sure that your device is connected to the car infotainment system using a USB cable.
2. From your Home Lcd, tap Apps icon.
3. Find and tap Settings > Xperia™ Connectivity > Start MirrorLink™.
4. Tap OK.
How to Make Conference Calls
Easy to start a conference call. You can discus your business over the phone with your associates with just a few tap on its touchLcd. With a conference or multiparty call, you can have a joint conversation with two or more persons. For details about the number of participants that you can add to a conference call, contact your network operator.
To make a conference call
1. During an ongoing call, tap
2. Dial the number of the second participant and tap Call. After the second participant answers, the first participant is put on hold.
3. Tap to add the second participant to the conference call.
4. Repeat steps 1 to 3 to add more call participants.
To have a private conversation with a conference call participant
1. During an ongoing conference call, tap {0} participants.
2. Tap the telephone number of the participant with whom you want to talk privately.
3. To end the private conversation and return to the conference call, tap.
To release a participant from a conference call
1. During an ongoing conference call, tap the button showing the number of participants. For example, tap 3 participants if there are three participants.
2. Tap next to the participant you want to release.
To end a conference call
• During the conference call, tap End conference call.
How to Add a Geotag on a Photo
Use your PC to transfer contacts to your new phone. This process is applicable in several phone brands, including iPhone, Samsung, HTC and Nokia.
You just need an Internet Connection on your PC, your old and new phone and their own USB cable.
Then you need to install the PC Companion program. This is a free application and the installation files are already saved on your new phone. This program can also be used in updating your phone software.
Please note that if you are using the Microsoft Windows 7 operating system on your PC, make sure that the AutoPlay setting is enabled.
To check your settings:
Click Start > Control Panel, then type "autoplay" on the search box. Click the AutoPlay, and mark the check box Use AutoPlay for all media and devices.
Installing the PC Companion:
Installing the PC Companion:
- Turn on your new Phone and connect it to your PC.
- On your new Phone, tap "Install" to install PC Companion on the PC.
- On your computer, if a pop-up window that appears notifies you about available PC Software, select Run Startme.exe.
- Then click Install to start the installation and then follow the instructions to complete the installation.
If you are not prompted with a pop-up window to install the PC Companion, you can also download the PC Companion here.
Transferring your contacts to your new phone:
- Make sure that PC Companion is installed on your PC.
- Open the PC Companion application on your PC.
- Then click Contacts Setup and follow the instructions to transfer your contacts.
How to Screen Mirror to Show the Screen on a TV
The Screen Mirroring will allow you to show the Lcd of your device on a TV or other large display using a cable connection or wirelessly using a Wi-Fi. It uses the Wi-Fi Direct technology that create a wireless connection between two devices. You can also use this feature to listen to music from your phone via the TVs speakers.
Mirroring the Lcd of your device on a TV using a cable:
You can connect your device to a TV set using an MHL cable or a HDMI cable and view content saved in your device on the TV Lcd. When you connect your device in this way to a compatible TV set, the TV launcher application opens. This application helps you to play media files from your device on TVs and other devices.
Note: You may have to purchase a cable and an adaptor separately.
To view content from your device on a TV which supports MHL input
1. Connect your device to the TV using an MHL cable. MHL iconappears in your devices status bar after a connection is established.
2. The TV launcher application starts automatically. Follow the instructions to view your media files on the TV.
To view content from your device on a TV which supports HDMI™ input
1. Connect your device to an MHL adaptor, and connect the adaptor to a USB power supply.
2. Connect the adaptor to a TV using a HDMI™ cable. appears in your devices status bar after a connection is established.
3. The TV launcher application starts automatically. Follow the instructions to view your media files on the TV.
To view help about using the TV remote control
1. While your device is connected to the TV set, drag the status bar downwards to open the Notification panel.
2. Tap MHL connected.
Note: You can also press the yellow button on the TV remote control to open the Notification panel.
To disconnect your device from the TV set
• Disconnect the MHL™ cable or the MHL adaptor from your device.
How to Mirror the Lcd of your device wirelessly on a TV
You can use Screen mirroring feature to show the Lcd of your device on a TV or other large display without using a cable connection.
Warning: Your TV must support Lcd mirroring based on Wi-Fi CERTIFIED Miracast™ for the functionality described above to work. If your TV does not support Lcd mirroring, you may need to purchase a wireless display adapter separately.
Warning: When using Lcd mirroring, the image quality may sometimes be negatively impacted if there is interference from other Wi-Fi® networks.
To mirror the Lcd of your device on a TV Lcd
1. TV: Follow the instructions in the User guide for your TV to turn on the Lcd mirroring function.
2. Your device: From your Home Lcd, tap Apps icon.
3. Find and tap Settings > Xperia™ Connectivity > Screen mirroring.
4. Tap Turn on Screen mirroring and select the device to which you want to mirror content.
Warning: When using Lcd mirroring, do not cover the Wi-Fi antenna area of your device.
Warning: Your TV must support Lcd mirroring based on Wi-Fi CERTIFIED Miracast™ for the functionality described above to work.
How to Activate Camera App and Play Tracks on a LockLcd
LockLcds dont normally allow users to launch any apps or even take photos. We still need to unlock our Lcds to use certain apps on our handset. But with your device, you can take photos, record videos and play tracks without unlocking the Lcd.
To take a photo on a lockLcd
1. Activate first your Lcd by briefly pressing the power key
2. Now activ the camera app
by dragging the camera icon to the left across the Lcd.3. And tap
to take photos or record videos without unlocking your Lcd.To play an audio on a lockLcd
1. Activate first your Lcd by briefly pressing the power key
.2. Now to display the music player controls, drag
to the right across the Lcd.3. And tap
to play a track on a lockLcd.To pause an audio track from the lockLcd
1. Activate first your Lcd by briefly pressing the power key
.2. When the music player controls appear, tap
to pause the track.To change the currently playing audio track on a lockLcd
1. Activate first your Lcd by briefly pressing the power key
.2. Then tap
orwhen the music player controls appear.How to Use NFC | Share Contacts, Music Files, Photo or Video and Web Address
NFC feature is a must-have for any smartphones these days. Near-field communication or NFC works similarly like bluetooth. By touching your NFC-enabled phones against each other, you can then share contacts, music and photos. Well, heres how you can easily share contacts on Sony Xperia Z2 uisng NFC feature.
1. On your Home Lcd, tap the Apps icon > Settings.
2. Then go to More.
3. Mark the NFC checkbox.
To share a contact with another device using NFC
1. Make sure that both devices have the NFC function turned on, and that both Lcds are active.
2. To view contacts, go to your Home Lcd, tap Apps icon, then tap Person icon.
3. Tap the contact that you want to share.
4. Hold your device and the receiving device back to back so that the NFC detection areas of each device touch each other. When the devices connect, a thumbnail of the contact appears.
5. Tap the thumbnail to start the transfer.
6. When the transfer is done, the contact information is displayed on the Lcd of the receiving device and is also saved on the receiving device.
To share a music file with another device using NFC
1. Make sure that both your device and the receiving device have the NFC function turned on, and that both Lcds are active.
2. To open the "WALKMAN™" application, tap Apps icon, then find and tap Walkman icon.
3. Select a music category and browse to the track you want to share.
4. Tap the track to play it. You can then tap Pause icon to pause the track. The transfer works whether the track is playing or paused.
5. Hold your device and the receiving device back to back so that the NFC detection areas of each device touch each other. When the devices connect, a thumbnail of the track appears.
6. Tap the thumbnail to start the transfer.
7. When the transfer is done, the music file plays immediately on the receiving device. At the same time, the file is saved on the receiving device.
To share a photo or video with another device using NFC
1. Make sure that both devices have the NFC function turned on, and that both Lcds are active.
2. To view photos and videos in your device, go to your Home Lcd, tap Apps icon, then find and tap Album.
3. Tap the photo or video that you want to share.
4. Hold your device and the receiving device back to back so that the NFC detection areas of each device touch each other. When the devices connect, a thumbnail of the track appears.
5. Tap the thumbnail to start the transfer.
6. When the transfer is done, the photo or video is displayed on the Lcd of the receiving device. At the same time, the item is saved on the receiving device.
To share a web address with another device using NFC
1. Make sure that both devices have the NFC function turned on, and that both Lcds are active.
2. From your Home Lcd, tap Apps icon.
3. To open the web browser, find and tap Chrome browser icon.
4. Load the web page that you want to share.
5. Hold your device and the receiving device back to back so that the NFC detection areas of each device touch each other. When the devices connect, a thumbnail of the track appears.
6. Tap the thumbnail to start the transfer.
7. When the transfer is done, the web page is displayed on the Lcd of the receiving device.
How to Hard Reset
We have our own reasons why we hard reset our device. Maybe we want to delete all the files and restore the device to its original state. It could also be the device may be malfunctioning or so slow and it needs to be reset.
Restoring the default settings or factory reset your Sony Xperia Z2 will delete all your existing files. It is recommended to backup your important files on your computer before attempting to reset your device.
1. Sony made a special button, just by pressing it your device will reset to default or to its original state.
2. You can find the Hard Reset button under the flap cover of MicroSD card slot on your Xperia Z2.
3. Just use a thick or moderate pen, or any object that will fit to the hole to press it.
Use this method if your device is frozen or unable to solve by Factory Reset.
Application Lcd
The Application Lcd, which you open from the Home Lcd, contains the applications that come pre-installed on your device as well as applications that you download.
To view all applications on the Application Lcd
1. From your Home Lcd, tap Apps icon .
2. Flick left or right on the Application Lcd.
To open an application from the Application Lcd
• Flick left or right to find the application, and then tap the application.
To open the Application Lcd menu
• When the Application Lcd is open, drag the left edge of the Lcd to the right.
To move an application on the Application Lcd
1. To open the Application Lcd menu, drag the left edge of the Application Lcd to the right.
2. Make sure that Own order is selected under SHOW APPS.
3. Touch and hold the application until it magnifies and the device vibrates, then drag it to the new location.
To add an application shortcut to the Home Lcd
1. From the Application Lcd, touch and hold an application icon until the Lcd vibrates, then drag the icon to the top of the Lcd. The Home Lcd opens.
2. Drag the icon to the desired location on the Home Lcd, then release your finger.
To arrange applications on the Application Lcd
1. To open the Application Lcd menu, drag the left edge of the Application Lcd to the right.
2. Select the desired option under SHOW APPS.
To search for an application from the Application Lcd
1. To open the Application Lcd menu, drag the left edge of the Application Lcd to the right.
2. Tap Search apps.
3. Enter the name of the application that you want to search for.
To uninstall an application from the Application Lcd
1. To open the Application Lcd menu, drag the left edge of the Application Lcd to the right.
2. Tap Uninstall. All uninstallable applications are indicated by X mark.
3. Tap the application that you want to uninstall, then tap Uninstall.
Shortcuts and folders
Use shortcuts and folders to manage your applications and keep your Home Lcd tidy.
To add a shortcut to your Home Lcd
1. Touch and hold an empty area on your Home Lcd until the device vibrates and the customisation menu appears.
2. In the customisation menu, tap Apps.
3. Scroll through the list of applications and select an application. The selected application gets added to the Home Lcd.
In step 3, alternatively, you can tap Shortcuts and then select an application from the list available. If you use this method to add shortcuts, some of the applications available allow you to add specific functionality to the shortcut.
To move an item on the Home Lcd
• Touch and hold the item until it magnifies and the device vibrates, then drag the item to the new location.
To delete an item from the Home Lcd
• Touch and hold an item until it magnifies and the device vibrates, then drag the item to Trash bin icon.
To create a folder on the Home Lcd
• Touch and hold an application icon or a shortcut until it magnifies and the device vibrates, then drag and drop it on top of another application icon or shortcut.
To add items to a folder on the Home Lcd
• Touch and hold an item until it magnifies and the device vibrates, then drag the item to the folder.
To rename a folder on the Home Lcd
1. Tap the folder to open it.
2. Tap the folders title bar to show the Folder name field.
3. Enter the new folder name and tap Done.
How to Share Content with DLNA Certified Devices
You can view or play media content saved to your device on other devices such as, for example, a TV, or a computer. Such devices must be DLNA Certified™ by the Digital Living Network Alliance and all devices must be connected to the same Wi-Fi® network in order for content to be shared. You can also view or play content from other DLNA Certified™ devices on your device.
After you set up the sharing of content between devices, you can, for example, listen to music files stored on your home computer from your device, or view photos taken with your devices camera on a large-Lcd TV.
Playing files from DLNA Certified™ devices on your device
When you play files from another DLNA Certified™ device on your device, this other device acts as a server. In other words, it shares content over a network. The server device must have its content sharing function enabled and give access permission to your device. It also must be connected to the same Wi-Fi® network as your device.
To play a shared track on your device
1. Make sure the devices that you want to share files with are connected to the same Wi-Fi® network as your device.
2. From your Home Lcd, tap Apps icon, then find and tap WALKMAN.
3. Select a device from the list of connected devices.
4. Browse the folders of the connected device and select the track that you want to play. The track starts playing automatically.
To play a shared video on your device
1. Make sure the devices that you want to share files with are connected to the same Wi-Fi® network as your device.
2. From your Home Lcd, tap Apps icon, then find and tap Movies.
3. Select a device from the list of connected devices.
4. Browse the folders of the connected device and select the video that you want to play.
To view a shared photo on your device
1. Make sure the devices that you want to share files with are connected to the same Wi-Fi® network as your device.
2. From your Home Lcd, tap Apps icon.
3. Find and tap Album > My albums. All your available online albums and connected devices are displayed.
4. Select a device from the list of connected devices.
5. Browse the folders of the connected device and select a photo to view it.
Preparing to play content from your device on DLNA Certified™ devices
You must set up file sharing on your device first before you can view or play media files from other DLNA Certified devices. Your device works as a media server when it makes content available to client devices. When you set up file sharing on your device, you must also give access permission to client devices. After you do so, such devices appear as registered devices. Devices that are waiting for access permission are listed as pending devices.
To stop sharing files with other DLNA Certified™ devices
1. From your Home Lcd, tap Apps icon.
2. Find and tap Settings > Xperia™ Connectivity > Media server settings.
To set access permissions for a pending device
1. From your Home Lcd, tap Apps icon.
2. Find and tap Settings > Xperia™ Connectivity > Media server settings.
3. Select a device from the Pending devices list.
4. Select an access permission level.
To change the name of a registered device
1. From your Home Lcd, tap .
2. Find and tap Settings > Xperia™ Connectivity > Media server settings.
3. Select a device from the Registered devices list, then select Change name.
4. Enter a new name for the device.
To change the access level of a registered device
1. From your Home Lcd, tap Apps icon.
2. Find and tap Settings > Xperia™ Connectivity > Media server settings.
3. Select a device from the Registered devices list.
4. Tap Change access level and select an option.
To get help about sharing content with other DLNA Certified™ devices
1. From your Home Lcd, tap Apps icon.
2. Find and tap Settings > Xperia™ Connectivity > Media server settings.
3. Tap Question mark icon.
How to Use Car Infotainment System
Connect your device to a MirrorLink™ certified car infotainment system using a USB cable to, for example, use a navigation app or play music from your device while driving. The car infotainment system mirrors all features on your device and gives you access to all applications. When connected, you can navigate the apps using the car infotainment system controls.
Some applications may not be available in driving mode. Also, protected data, such as videos that are strictly protected under Digital Rights Management (DRM), is not made available via MirrorLink™.
To connect your device to a car infotainment system
• Connect your device and the car infotainment system using a USB cable. The Lcd of your device appears on the Lcd of the infotainment system.
Warning: You may need to start MirrorLink™ manually if the connection between your device and the infotainment system is not established automatically.
To start MirrorLink™ manually
1. Make sure that your device is connected to the car infotainment system using a USB cable.
2. From your Home Lcd, tap Apps icon.
3. Find and tap Settings > Xperia™ Connectivity > Start MirrorLink™.
4. Tap OK.
How to Make Conference Calls
Easy to start a conference call. You can discus your business over the phone with your associates with just a few tap on its touchLcd. With a conference or multiparty call, you can have a joint conversation with two or more persons. For details about the number of participants that you can add to a conference call, contact your network operator.
To make a conference call
1. During an ongoing call, tap
2. Dial the number of the second participant and tap Call. After the second participant answers, the first participant is put on hold.
3. Tap
to add the second participant to the conference call.4. Repeat steps 1 to 3 to add more call participants.
To have a private conversation with a conference call participant
1. During an ongoing conference call, tap {0} participants.
2. Tap the telephone number of the participant with whom you want to talk privately.
3. To end the private conversation and return to the conference call, tap
.To release a participant from a conference call
1. During an ongoing conference call, tap the button showing the number of participants. For example, tap 3 participants if there are three participants.
2. Tap
next to the participant you want to release.To end a conference call
• During the conference call, tap End conference call.
How to Add a Geotag on a Photo
Adding a location to those photos somehow adds relevance and it gives you that flashback of memories when you view those nicely captured moments. Well, this feature is not new any longer since its been there online and you often use them on photo-filtered websites. But with Sony Xperia Z2, you can now add geotags on your photos right on your handset. Heres how you can add geotag on your photos.
1. Open your photo gallery on your device.
2. When youre viewing a photo, just tap the Lcd and the toolbars will display.
3. Now tap to open the map Lcd.
4. Find and tap the desired location to put the map on the photo.
5. To adjust the location of the photo, just tap the location on the map to where you want to move the photo.
6. Tap OK when youre done and to save the geotag. You can then return to the photo viewer Lcd.
1. Open your photo gallery on your device.
2. When youre viewing a photo, just tap the Lcd and the toolbars will display.
3. Now tap
to open the map Lcd.4. Find and tap the desired location to put the map on the photo.
5. To adjust the location of the photo, just tap the location on the map to where you want to move the photo.
6. Tap OK when youre done and to save the geotag. You can then return to the photo viewer Lcd.
Thursday, September 25, 2014
Sony Xperia S Tips and Tricks
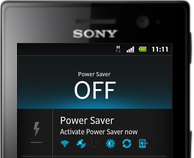
Here are some How Tos for your Sony Xperia S. These How Tos are still not yet complete and I am still working on the others. Visit this site often for the other how tos.
Follow these steps on how to reset the Sony Xperia S:
- From your Home Lcd, tap the Menu icon.
- Tap Settings, then select Privacy.
- Tap Factory data reset.
- Tap Reset phone.
- Then you need to confirm by tapping Erase everything.
How to Import Contacts From Old Phone to New Phone (on Sony, iPhone, Samsung, HTC and Nokia)
Contacts is very important for everyone of us. We cant connect to our friends without a contact number. If you have a new phone, saving contacts on the phone one by one is so hassle. But now, theres an easy way how to transfer or import your contacts from your old phone to your new phone.
Use your PC to transfer contacts to your new phone. This process is applicable in several phone brands, including iPhone, Samsung, HTC and Nokia.
You just need an Internet Connection on your PC, your old and new phone and their own USB cable.
If you are not prompted with a pop-up window to install the PC Companion, you can also download the PC Companion here.
Use your PC to transfer contacts to your new phone. This process is applicable in several phone brands, including iPhone, Samsung, HTC and Nokia.
You just need an Internet Connection on your PC, your old and new phone and their own USB cable.
Then you need to install the PC Companion program. This is a free application and the installation files are already saved on your new phone. This program can also be used in updating your phone software.
Please note that if you are using the Microsoft Windows 7 operating system on your PC, make sure that the AutoPlay setting is enabled.
To check your settings:
Click Start > Control Panel, then type "autoplay" on the search box. Click the AutoPlay, and mark the check box Use AutoPlay for all media and devices.
Installing the PC Companion:
Installing the PC Companion:
- Turn on your new Phone and connect it to your PC.
- On your new Phone, tap "Install" to install PC Companion on the PC.
- On your computer, if a pop-up window that appears notifies you about available PC Software, select Run Startme.exe.
- Then click Install to start the installation and then follow the instructions to complete the installation.
If you are not prompted with a pop-up window to install the PC Companion, you can also download the PC Companion here.
Transferring your contacts to your new phone:
- Make sure that PC Companion is installed on your PC.
- Open the PC Companion application on your PC.
- Then click Contacts Setup and folow the instructions to transfer your contacts.
How to Save Battery Life on Sony Xperia S
Sony Xperia S lets you manage power consuming apps with its power saving mode. This feature lets you customize the settings within each power saving mode which suits the way you use your phone. You can turn off handset functions like wi-fi and Lcd brightness right on this power saving mode. Heres how you can activate Power Saver on Sony Xperia S so you can save your devices battery life.
1. On your devices homeLcd, tap on

2. Scroll and tap on Power Saver icon.The Power Saver menu will then be displayed.
3. Tap on the Power Saver option to see the Power Save mode settings menu with the handset functions.
4. On the list, choose which functions you would like to turn on/off when youre on power saver mode.
5. Tap on Done.
6. After youve chosen what functions to turn on/off when on power saver mode, tap on the Power Saver icon to activate it.
Now you have just activated the power saver mode. A power saver icon will then appear at the top of the display. Youll be able to save your phones battery life. To deactivate the power saving mode, follow steps 1 and 2. And tap the icon next to the active power saving mode to turn it off.
Follow also these tips:
• Lessen the Lcd brightness and the Lcd lock timeout.
• Turn down your device volume with the volume keys.
• Close any apps or features when you are done using it so they will not continuously running in the background.
• Turn off the network connection if you are out of range so that your device will stop searching for a network signal. Or you may switch your settings to Airplane mode.
• Shut down your device when you do not use it for a long time.
• You should use the latest version of the software update. Software updates improves some features and fixes some bugs on the previous software version.
How to Start a Conference Call on Sony Xperia S
How to Set Up Your Facebook Account on Sony Xperia S
Keeping your devices secure from any intrusion is indeed a challenge. With most people exposed to online activities, unconsented distribution of information/videos/photos due to hacking, are easily spread and goes viral. So, to prevent any leak on yoursmartphone, passwords or patterns are ready to be activated in it to give a little assurance that your device is somehow secure. Sony Experia Ss Face Unlock feature is perhaps one of the coolest, so far, to keep your phone protected. If youve got one, here are the steps on how to set up this feature. Take note that this feature is lesssecure than a Lcd lock pattern or PIN especially if someone looks similar to you. For best result, make sure that youre in an indoor area that is well lit and hold your phone at an eye level before you capture a photo of your face.
To activate Face Unlock feature:
1. On your devices home Lcd, tap on Application Lcd icon.
2. Then go to Settings.
3. Under Security, tap on Screen Lock.
4. Tap on Face Unlock. Follow the succeeding steps in your phone so you can capture a photo of your face.
5. After youre done taking a photo of your face, set up Lcd lock Pattern or PIN as a back up method to unlock your Lcd in case youll not be recognized by your device.
To unlock the Lcd using Face Unlock:
1. Activate the Lcd.
2. Look at your phone at the same angle when you took your Face Unlock photo.
With conference call you can talk to two or more parties simultaneously right thru your phone. Adding multiple participants even if your on a call is just few taps away with Sony Xperia S. Heres how to create a conference call.
1. If youre on an ongoing call, tap .
.
2. Then dial the number of the second participant and tap .
.
3. When the second participant answers the call, the first call is put on hold.
4. Tap on to start the conference call. Repeat the same steps to add more participants to the conference call.
To have a private conversation with one of the participants
1. Tap the button showing the number of participants during the ongoing conference call.
2. Then tap on the name of the participant you wish to talk privately.
3. To end the conversation and return to the conference call, tap
To release a participant during the ongoing conference call
1. Tap the button showing the number of participants during the ongoing conference call.
2. Then tap next to the participant you want to release from the call.
To end the conference call
1. During the conference call, just tap End Conference Call.
1. If youre on an ongoing call, tap
.2. Then dial the number of the second participant and tap
.3. When the second participant answers the call, the first call is put on hold.
4. Tap on
to start the conference call. Repeat the same steps to add more participants to the conference call.To have a private conversation with one of the participants
1. Tap the button showing the number of participants during the ongoing conference call.
2. Then tap on the name of the participant you wish to talk privately.
3. To end the conversation and return to the conference call, tap
To release a participant during the ongoing conference call
1. Tap the button showing the number of participants during the ongoing conference call.
next to the participant you want to release from the call.To end the conference call
1. During the conference call, just tap End Conference Call.
We simply cant get enough of Facebook. And this social networking giant made sure that they still exist even on your smartphones. Now you can set up a Facebook Account right on your Xperia phone which will give you easy navigation on Facebook. Heres how you can set up your Facebook account to work on your Xperia device.
1. On your devices homeLcd tap on
2. Then tap on Settings and go to Accounts & sync.
3. The Active auto-sync checkbox should be marked to make sure that applications can synchronise data automatically.
4. Tap on Add Account and then Facebook.
5. Just follow the registration wizard to create an account or you can sign in if you already have one.
6. Once youre done, select a synchronisation option for your account and tap on Finish.
Your Facebook account is now set up to work on your phone.
How to Use the Face Unlock Feature on Sony Experia S
2. Then tap on Settings and go to Accounts & sync.
3. The Active auto-sync checkbox should be marked to make sure that applications can synchronise data automatically.
4. Tap on Add Account and then Facebook.
5. Just follow the registration wizard to create an account or you can sign in if you already have one.
6. Once youre done, select a synchronisation option for your account and tap on Finish.
Your Facebook account is now set up to work on your phone.
How to Use the Face Unlock Feature on Sony Experia S
To activate Face Unlock feature:
1. On your devices home Lcd, tap on Application Lcd icon.
2. Then go to Settings.
3. Under Security, tap on Screen Lock.
4. Tap on Face Unlock. Follow the succeeding steps in your phone so you can capture a photo of your face.
5. After youre done taking a photo of your face, set up Lcd lock Pattern or PIN as a back up method to unlock your Lcd in case youll not be recognized by your device.
To unlock the Lcd using Face Unlock:
1. Activate the Lcd.
2. Look at your phone at the same angle when you took your Face Unlock photo.
Subscribe to:
Posts (Atom)
