Showing posts with label galaxy. Show all posts

Thursday, November 20, 2014

Samsung I9230 Galaxy Golden pattern lock hard reset


On dial screen enter this Samsung I9230 Galaxy Golden reset code: *2767*3855#

or

Use Samsung I9230 Galaxy Golden Backup and reset function(wzmobile.asia)
Go to Settings *> Backup and reset *> Factory data reset: Reset settings to the factory default values and delete all data.
Your device freezes or has fatal errors, pattern lock  (wzmobile.asia)
If your device freezes or hangs, you may need to close applications or reinsert the battery and
turn on the device to regain functionality. If your device is frozen and unresponsive, press and
hold the Power button for more than 8-10 seconds to reboot.(wzmobile.asia)
If this does not solve the problem, perform a factory data reset. On the Applications
screen, tap Settings -> Backup and reset -*> Factory data reset -> Reset device -> Erase everything. Before performing the factory data reset, remember to make back-up copies of all important data stored on the device.(wzmobile.asia)

Samsung I9230 Galaxy Golden pattern lock */soft reset / restart(wzmobile.asia)
Read More..

Monday, November 17, 2014

How to Install T111XXUBNB2 Android 4 2 2 Jelly Bean Firmware

Install Android 4.2.2 Jelly Bean Official Firmware on Galaxy Tab 3 7.0 Lite T111 through Odin:

  1. Download Android 4.2.2 XXUBNB2 Firmware for Galaxy Tab 3 7.0 Lite T111 from the above list
  2. Download Odin 3.09
  3. Switch off your Tablet and boot Galaxy Tab 3 7.0 Lite T111 into Download Mode by pressing and holding the Volume Down and Power keys together until you get the warning message, now press Volume Up key to proceed to Download Mode..
  4. Extract the downloaded Odin3.07 zip file and run the Odin3 v3.07.exe file as an administrator (Right click on the .exe file and click on Run as administrator)
  5. Now connect your Galaxy Tab 3 7.0 Lite T111 to your computer via USB cable
  6. In Odin3 Lcd, you should see a COM Port number like “0:[COM7]” at ID:COM section and “Added!” text at the message box. This means your device has been detected by Odin3.
  7. Make sure that, only the “Auto Reboot” and “F. Reset Time” options are checked.
  8. Now, extract the downloaded firmware zip file, you’ll find a firmware file with extension .tar.md5
  9. In Odin Lcd, click on PDA button and select the firmware file with .tar.md5 extension (The firmware file look something like: T111XXDLJ5_T111ODDDLI7_INU.tar.md5)
  10. Now, click on the Start button to begin the installation process, wait few moments.
  11. Once completed, you would see “PASS!” message in ID:COM port having green background
  12. Your Tablet should automatically reboot after completion
  13. You can now disconnect your Tablet from computer
  14. Finish
Read More..

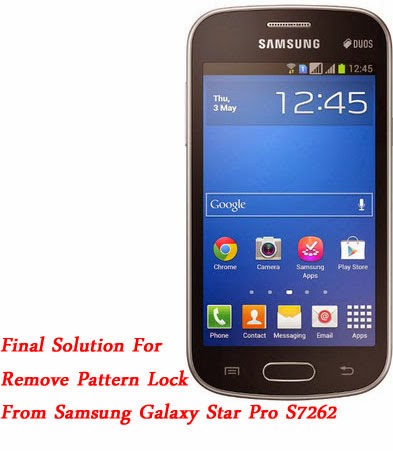
Remove Pattern Lock From Samsung Galaxy Star Pro 100 Working Solution

How To Remove Pattern Lock From Samsung S7262 100% Working Solution

Here The Solution For Remove Pattern Lock From Samsung Galaxy Star Pro . It Was Simple And Tested 100% Working Way Try this Way And Comment Your Result

Samsung 
  • Tools And Files:
  1. Odin3
  2. S7262 Csc File 
  • s7262 Pattern Lock Remove Steps  
  1. Put Your Phone To Download Mode By Step :- Switch Off Your Phone . Press And Hold Volume Down + Home Key And Power On Your Phone . Now You See a Warning . Press Volume Up To Continue.
  2.  Open Odin3.exe 
  3. Connect Your Phone To Pc Using Data Cable 
  4. Now You See A Id In Id:Com Section 
  5. Click On Csc Tab In Odin And Select Downloaded Csc.tar.Zip  
  6.  Now Click Start And Wait Some Seconds  
  7. After Completing Process Your Phone Will  Reboot In To Recovery  Select Wipe / Data Reset  
  8. Done !

Read More..

Thursday, October 23, 2014

How to Root Verizon Samsung Galaxy S3 I535

To root your Verizon Galaxy S3 smartphone device, you will need to respect all instructions bellow , and when the process is complete you’ll be also able to flash CWM Recovery image on your device.
This tutorial will help you to learn how to successfully root Verizon Galaxy S3 device using the Odin application and two files in .img format.
When you will have root rights on your device you’ll be able to install and run new Android applications with root needs, another greats advantage its performance device improvements, in plus, eventually flash new custom ROMs on your Android smartphone.
Read the preparation guide with attention before starting to root your device.
How to correctly prepare the Verizon Galaxy S3 smartphone and your computer for the root process:
  • This guide is only for the Verizon Samsung Galaxy S3 model number I535.
  • Do not apply this tutorial on other US variants of S3 nor on any other International Galaxy S3 device.
  • Check your device’s number model:
for make this: Open> Settings and see on about phone menu the model number for your device.
  • Make backup for all files stored on your phone.
  • Enable USB Debugging from Android option.
  • Charge your device Verizon S3 battery until it reaches 80% power levels, this thing will assure you to prevent a power OFF when you’re applying the rooting process.
  • Install on your Computer the USB drivers for Samsung Galaxy S3 USB.
  • Disable all antivirus or antimalware programs protection from your computer.
This guide requires being an advanced Android user and you should to be an advanced Android user.
Apply only the steps presented in this tutorial and you should be safe.
NOTE: Use this guide at your own risk. We will not be held liable for any damage on your device as a result of using  all instructions and this guide.
Now if you understood all risks and all instructions above, it means that you’re ready to apply the next guide:
Don’t skip any steps, read all guide steps and instructions first and only after start installing Odin and root your device.

Guide How to root Verizon Galaxy S3 with Odin tool

1. First download application Odin 3.07  from HERE.
2. Extract the zip file into Odin folder.
3. Download the next two root files on your PC: Blank System.img.tar | Rooted System.img.tar
4. Save them in the Odin folder.
5. Power OFF your Verizon S3 device, and boot into Download Mode.
6. To Enter on Download Mode must to press and keep hold ‘volume down’ + ‘home’ + ‘power’ buttons at the same time.
7. A ‘warning!!’ alert will by display on your device and now you need to press ‘volume up’ to load the Download Mode.
8. Run ODIN executable.
9. Now should to connect the Galaxy S3 I535 to your computer via Original USB Cable.
10. Check ODIN application, if ODIN says ‘added!!’ can to apply the next step, if not says ‘added!!’ you should return on preparation requires guide and download and install the USB drivers for your device. Another solution is to change the USB port from your computer and see if ODIN says that the device was ‘added’.
11. When all drivers have been installed ok and the ODIN application work with your smartphone, you can move to the next step.
12. Click the ‘PDA’ tab in ODIN and select ‘black.system.img.tar’ file.
Attention: don’t change the default ODIN options and be sure that the ‘re-partition’ setting is not checked.
Press START and now the Blank system.img.tar file will begin to install on your Verizon S3 smartphone.
13. When the installation is finished your Verizon S3 will restart automatically, and when the Samsung LOGO is displayed you can unplug the smartphone from your computer.
ODIN should say ‘PASS’. If ODIN don’t work and gets stuck :
  • Unplug the Smartphone
  • Remove battery device.
  • Close ODIN application.
  • Re-insert the battery on your device.
  •  Repeat the guide starting with step 6.
Note: When you installing the Blank system.img on your device Verizon Galaxy S3, the device will restart and it will remains locked in the moment when the Samsung logo appears, be calm and go on to remove the smartphone’s battery, after that re-insert the battery and boot into Download Mode your device once again.
For Next steps follow the instructions bellow:
  • Boot your device in Download Mode (like you did at step 4).
  • Close the Odin application and after that launch the Odin application again.
  • Connect your smartphone to your PC via original USB cable.
  • Click in ODIN application the ‘PDA’ tab button and after that select ‘rooted.system.img.tar’ file.
  • Press ‘START’ button in ODIN and now should to wait until the rooted system image file is flashed.
After the process will be completed, your device will reboot and now you can unplug the USB cable from your smartphone when the Samsung Galaxy S3 Logo is displayed.
Your Verizon Samsung Galaxy S3 model number I535 device should boot now into normal Android mode, and root was successful. 
Read More..

Wednesday, October 22, 2014

Samsung Galaxy Tab 2 7 0 P3100 to Android 4 1 Jelly Bean official Firmware here

SamMobile found a way to update Android 4.1.1 Jelly Bean OTA update for the Galaxy Tab 2.7.0 (GT-P3100) for India, this update unfortunately isn’t available to anyone, but exist one way to get this update before, if you want to give Samsung’s Die Hard fans a taste of Jelly Been before the official release.
This update it’s a really helpfully for 3rd party Android Developers(CyanogenMod Team), to testing and adding new optimizations for their Android 4.1.1 Jelly Bean customs ROM’s for the Galaxy Tab 2 from Samsung.
Ota firmware details : Android 4.1.1-JRO03C operating system, PDA: P3100DDBLI1, India(INU) country, it’s build in September 8, 2012, and have 295.2MB size, OTA updates wants a specific OTA updates’ need a specific base firmware on which they can be flashed upon and are flashed through the stock Samsung Recovery.
A condition for this update is This P3100DDBLI1 Android 4.1.1 Jelly Bean OTA updates have need of the user to be on P3100DDBLH3 firmware.
In the next section we can find the steps for make the OTA update on your Samsung Galaxy Tab2 7.0 (GT-P3100).:
Attention! It’s very important to make sure you perform a backup of all your data before attempting to install this!
First step on flashing the OTA Update is to make a backup of your all data, the second step it’s to download the Base firmware necessary by the OTA Update, P3100DDBLH3 -download it from here, after this unzip the file.
Go to open Odin 3.04 (If you don’t have it you can download it from HERE), restart your device into download mode, for make this press power button plus volume down.
Connect phone and wait until you get a yellow/blue sign in Odin software interface, after this step add the updateP3100DDBLH3_P3100ODDBLH1_P3100DDLG1_HOME.tar.md5 to PDA, verify re-partition is NOT ticked, Start flash, don’t touch anything and wait a few minutes.
Update your device with P3100DDBLI1 OTA Update:
Go to Download the P3100DDBLI1 OTA Update (Download it from HERE), and after copy the P3100DDBLI1 OTA Update in your External SD Card.
The next step is to restart device in Recovery Mode( for make this press Power Button plus Volume Up button in the same time) then in menu Select Apply update from External Storage, browse to the OTA update and flash it. In this update process when OTA update is flashed perform “Wipe Data/Factory Restore”, will format your internal SD Card) The final step is to reboot your device.
source: sammobile
Read More..

Thursday, October 2, 2014

Manual Update GALAXY GRAND I9082 with Official Indian XXAMCD Jellybean 4 1 2 Firmware – Guide

 No doubt that Samsung Galaxy GRAND I9082 smartphone is one of the highest selling smartphones in India, but unfortunately there are some issues related to this and will be fully addressed in the upcoming Jellybean 4.2.2 firmware. Unfortunately, there is no ETA on by when there will be an official Jellybean 4.2.2 for Galaxy GRAND, but we will tell you in the due course of this article on how to apply with Official Jellybean 4.1.2 XXAMCD Firmware.


Before proceeding to the detailed guide on how to apply this firmware, you need to follow the list of pre requisites mentioned below. This is the Official Firmware Update released for Indians and can be applied to all the smartphones around the Globe.

Note: Applying this firmware won’t Root / Void the Warranty in any manner.

Quick Pre Requisites:
  • All the data in your Samsung Galaxy GRAND I9082 should be backed up with the help of below mentioned steps manually and not with the KIES PC Suite.
SMS – Use “SMS Backup & Restore app”,Contacts – Sync with the Gmail application,Call Log - Call Log and RestoreImages, Songs, Videos, Files – Copy to internal / External SD Card,APN and MMS Settings – Note down from the path “Applications > Settings > Wireless and Network > Mobile Networks > Access Point Names”
  • From the path “Settings > More > Development Options > USB debugging” enable the USB Debugging Mode.
  • Minimum charge left in your phone is 30% or else there is a risk of device getting turned off in the middle of rooting process.
Disclaimer: Follow all the instructions mentioned in this article as if there is any damage caused due to not following instructions then we shall not be held liable or responsible. Just in case if you face any issues then we will try our level best to address the same.
So assuming that you are done with the above mentioned steps, you can now proceed to the next page where we have mentioned a detailed guide on how to apply with this firmware update.


Procedure to Update GALAXY GRAND I9082 with XXAMCD Jellybean 4.1.2 Firmware:
  • The Galaxy GRAND can be entered into the Download mode by holding the Volume Down button + the Home key button (the middle button). While holding these both buttons, you need to switch ON your device.
  • Open Odin in your computer and connect your GALAXY Grand Smartphone to the computer with the help of original USB cable and then you will see that the ID: COM section will turn Blue / Yellow.
  • Click on “PDA” to select the tar file which you have got after extraction to click on “Start”. Once you click on “Start”, the process of firmware update will start. Please note that it will take around 3 -4 minutes for applying the update and once the update is applied successfully, the device will be rebooted automatically.
Note: If the device gets into the boot loop sequence or say gets stuck in the welcome Lcd, just re insert the battery and re follow the above instructions so as to again follow the above mentioned instructions.
So there you go, you have now successfully learnt on how to apply this update in your phone. Do let us know in the comments section or on out Facebook / Google+ Page if you face any issues. Just in case if you are interested then we will come out with the tutorial which will help you root the device.
Read More..

Wednesday, October 1, 2014

How To Guide Install XXUBML2 Android 4 2 2 JB Firmware on Galaxy S4 Active GT I9295

Samsung launches Android 4.2.2 firmware update XXUBML2 official Jelly Bean for Galaxy GT-I9295 Active S4. The firmware update launched in several countries including Switzerland, and also can be downloaded for manual updates. Hold I9295 Galaxy S4 Active smartphone is water and dust comes with Jelly Bean Android 4.2.2 out of the box, this new firmware update just brings bug fixes and performance tweaks. Continue reading this guide to learn how to get the stock Android 4.2.2 official I9295XXUBML2 Jelly Bean firmware running on the Galaxy GT-I9295 Active S4. Almost all of the possible ways to update your device to this firmware discussed here. One thing should be noted that the official firmware flashing or install kernel then restore root access you will fail, in short it will unroot it.


I9295XXUBML2 Jelly Bean Android 4.2.2 stock firmware that is available in both OTA and Kies update. However, if you can not get it from there then you can always blink I9295XXUBML2 Jelly Bean Android 4.2.2 firmware on Galaxy GT-I9295 Active S4 manual. We will discuss all the methods available updates. You should always try OTA or Kies method first and when the two methods do not work then just try flashing manually.

Pre Requisites:
Though official firmware restore all existing data but we recommend to back up your data first before proceeding to avoid any uncomfortable situation such as bootloop fix.

1. Backup your device data. 

2. Make sure your device have at least 60% battery power. You can install an app like Battery Notifier BT Free on your Android device to check it easily.
3. You already have USB Driver Installed for Galaxy S4 Active GT-I9295 in your PC. Download USB Drivers
4. Make sure USB Debugging is enabled otherwise you won’t able to transfer file between PC and Galaxy S4 Active GT-I9295. 

Warning: This tutorial is only for Galaxy S4 Active GT-I9295. Don’t try this guide on any other Android device. Also, we are not responsible for any damage caused due to the instruction given in this page. Try this at your own risk. However, it is very unlikely that your device will be damaged if you follow all the instructions as it is which are mentioned in procedure.
How To Update Galaxy S4 Active GT-I9295 via OTA
  1. First of all make sure you have stable internet connection (Wi-Fi or data network) on your device. 
  2. Now, go to Android app drawer and then select Settings. 
  3. Then locate About Device and tap on it. 
  4. Next select Software update from About device Lcd. 
  5. Then tap on Update option. 
  6. You should see an update, press OK to download and install. (Remember, download using 3G or network data will incur additional charges to your phone bill!) 
  7. Soon your device will reboot to complete the installation process.
If you see “The latest update have already been installed” massage while checking update then your device yet to receive an OTA update. Check back within few days or jump to next procedure.

How To Update Galaxy S4 Active GT-I9295 via Kies
  1. Make sure you have stable internet connection on your computer. 
  2. Now download and install Samsung Kies on your computer. 
  3. Turn on your device (if it off) and then connect it to computer with USB cable. 
  4. Run Samsung Kies and wait for it to detect your device. 
  5. You should see a New Firmware Upgrade is available at Samsung Kies home Lcd. 
  6. Press the Firmware Upgrade button to proceed. 
  7. Follow on Lcd instruction and soon you will see your device running upgrade and reboot automatically. Once done, you can disconnect your device from computer.
Again! If you see “This is the latest firmware” in Samsung Kies, then your device yet to receive the latest update on Kies. Its good time to go for manual update instruction that located below.


I9295XXUBML2 Android 4.2.2 Jelly Bean Firmware Details:

PDA: I9295XXUBML2
CSC: I9295AUTBML1


Please Note: After flashing this firmware you will lost any installed custom ROM including CM10.2, AOKP, Avatar,Beanstalk, Omni ROM, Slim ROM, Pac-Man, Paranoid Android, LiquidSmooth or Carbon.

How To Install I9295XXUBML2 Android 4.2.2 Jelly Bean On Galaxy S4 Active GT-I9295 Manually
  1. Download Odin v3.09. 
  2. Extract Firmware zip file that you downloaded earlier from above link, you will get a .tar.md5 file and some other files (optional). 
  3. Extract Odin zip file and you will get Odin3 v3.09.exe along with few other files. 
  4. Power off your Android device. Wait 5-6 seconds for vibration to confirm complete switch off. 
  5. Now, put the Galaxy S4 Active GT-I9295 in Download Mode by pressing and holding down the Home &Volume Down button together while pressing the Power button. A warning Lcd will come up; press Volume Up button to enter Download Mode. 
  6. Now run Odin3 v3.09.exe (see Step 3) as an Administrator because Admin privileges is required to complete the process smoothly (only applicable Windows Vista and higher). 
  7. Now connect your device to your PC using USB cable. An “Added!!” massage will appear in Odin’s message box. If you don’t get the same then you should try another USB port (try USB port located in back in your desktop PC). If that too don’t work then you should reinstall the driver. If you successfully see the “Added!!” message in Odin then you are ready to go in next step. You should also see COM port with a number in Yellow if you successfully added your device. 
  8. Click the AP Button, and select that .tar.md5 file that you get in Step 2. 
  9. In Odin window, make sure only Auto Reboot and F. Reset Time checkboxes are selected. 
  10. Double check everything that we mentioned in Step 8 & Step 9 above. Now, once satisfied hit the START button to begin the flashing process. 
  11. Once flashing completed, your Galaxy S4 Active GT-I9295 will restart and soon you will see a PASS message with green background in the left-most box at the very top of the Odin. You can now unplug the USB cable to disconnect your device from computer.
Congrats! You just updated your Galaxy S4 Active GT-I9295 to Android 4.2.2 Jelly Bean firmware. Go to Settings > About device to verify this firmware update.

Fix Boot Loop Issue On Galaxy S4 Active GT-I9295

If Galaxy S4 Active GT-I9295 stuck at booting animation for more than 10 minutes after Step 11 then follow below instructions: 
  • Go to recovery mode. To do so, press and hold the Volume Up, Home and Power buttons together. 
  • Now perform Wipe data/Factory Reset and Wipe Cache Partition task before selecting reboot system now function. In recovery mode use Volume keys to navigate between options and Power key to select the option.
Please note, performing wiping task will erase your device internal memory data and not external SD card data.

That’s it! Let us know about your latest Android 4.2.2 Jelly Bean experience.
Read More..

Wednesday, September 24, 2014

Samsung Galaxy S3 Touch Screen Not Working fix problem

Samsung Galaxy S3 Touch Screen Not Working How to Fix problem,Samsung Galaxy S3 Touch Screen no response  Working How to Fix problem,Samsung Galaxy S3 Touch Screen ways Working How to Fix problem,Samsung Galaxy S3 how to working Touch Screen Not Working How to Fix problem,Samsung Galaxy S3 Touch Screen line was damage  Working How to Fix problem,Samsung Galaxy S3 Touch Screen Not Working which parts are problem to no working this Gui procedure here step by step.
Read More..

Tuesday, September 23, 2014

LiquidSmooth Rom For Samsung Galaxy S i9000

 
Feautures found Over:-

Google GCC 4.7 Toolchain
O3
Strict-Aliasing (Linaro)
C++11 Mode
Optimized String Handling Routines (Linaro/Sony)
Misc other Linaro and Code Aurora Optimaztions
Customizable lockLcd buttons and sliders
Chronus clock widget
Customizable hardware and software keys
Transparent navbar and status bar
Customizable navbar ring
Navigation bar widgets
Customizable power menu
Notification power widget
Customizable quicksettings panel
Statusbar mods
Theme engine
Quiet hours
Volume rocker music controls
Full Rotation
Customizable battery and notification light

How To Flash The Rom:- 
[So Here am I with for the one You waiting For and Scrolling too.. Now Ill give u a perfect Way to Flash this Custom Rom... You would be Thinking this one Would be as Same as the one which Normally others are but not Like it Now.!! This One is Quite Different from Others.]
  • If You are new To the Custom Roms or Coming From any Other Stock Rom.. You Require To Root Your Device First To Avoid any Interruption from the Android Administrational Setting... 
  • [Since You have Rooted Your Device You would be knowing how to Operate Your Device into recovery Mode... So Now lets Head Towards our Next Step.] Navigate towards.. Format Data... Clear Cache Partiion.. Clear Dalvik Cache...
  • After Clearing Up all the Data From Your Handset..  Navigate towards Apply Update from Sd Card and Select the LiquidSmooth.zip File and Press Home Button...
  • After the LiquidSmooth.zip is flashed Select the GApps.zip File and Press Home Button to Flash it Up...[This was Done to get The Latest Android features Up to your Device..]
  • It May Take up  Few Minutes.. Please Be Patient. After the Zip is Flashed.. Select Reboot System Now..
Read More..

Monday, September 22, 2014

Samsung Galaxy S3 i9300 Charging Jumper Solution

Samsung Galaxy S3 i9300 Charging Jumper Solution,Samsung Galaxy S3 i9300 no Charging Jumper Solution,Samsung Galaxy S3 i9300 Charging no response Jumper Solution ways diagram,Samsung Galaxy S3 i9300 Charging ways damage Jumper Solution Guide Step By Step Procedure Here.
Read More..

How To Android 4 3 Jelly Bean Carbon ROM For Sprint Galaxy S3 SPH L710

Now you can download and install Android 4.3 Jelly Bean custom firmware based on the Carbon Sprint Galaxy S3 SPH-L710 you. Carbon Developer team recently introduced Carbon latest build of Android 4.3 Jelly Bean lets the Galaxy S3 Sprint SPH-L710 you. This Android 4.3 Jelly Bean ROM Carbon build using CM10.2 source but is equipped with various additional features. Only a few of the key features of Carbon ROM, can be customized hardware and software keys, transparent navbar and the status bar, menu and power adjustable Theme engine. We conclude the installation tutorial details of Android 4.3 Jelly Bean Carbon-based custom ROM on Galaxy S3 Sprint SPH-L710 below.

Most of the cool features of Android 4.3 Jelly Bean which will permit you to enjoy it is the manager, virtual surround sound, a dial pad improves both the Linux kernel, can create a Bluetooth pairing with low-power devices, controls unlimited user accounts with profile, slim features that are not allow your phone to slow with time and more.

Carbon Key Features:
  1. Android 4.3
  2. PIE
  3. Halo
  4. AOKP Ribbons
  5. Comprehensive speed enhancements and processor-specific optimizations
  6. Option to hide lockLcd hints
  7. Carousel lockLcd
  8. Customizable lockLcd buttons and sliders
  9. Customizable hardware and software keys
  10. Transparent navbar and status bar
  11. Customizable navbar ring
  12. Navbar arrow keys
  13. Navigation bar widgets
  14. Customizable power menu
  15. Notification power widget
  16. Notification brightness adjustment
  17. Customizable quicksettings panel
  18. Statusbar mods including center clock and color
  19. LCD Density
  20. Theme engine
  21. Quiet hours
  22. Volume rocker music controls
  23. Full Rotation
  24. Customizable battery and notification light
  25. More that havent even been mentioned, and more to come!
Warning!

This tutorial is only for Sprint Galaxy S3 SPH-L710. Don’t try this guide on any other Android device. Also, we are not responsible for any damage caused due to the instruction given in this page. Try this at your own risk. However, it is very unlikely that your device will be damaged if you follow all the instructions as it is which are mentioned in procedure.
Pre Requisites:

1. Backup your device data.

2. Make sure your device have at least 60% battery power. You can install an app like Battery Notifier BT Free on your Android device to check it easily.

3. You already have USB Driver Installed for Sprint Galaxy S3 SPH-L710 in your PC. Download USB Drivers

4. Make sure USB Debugging is enabled otherwise you won’t able to transfer file between PC and Sprint Galaxy S3 SPH-L710.

5. Your device have ClockworkMod Recovery Installed. 

6. Your device is already rooted. [Guide]

If you done everything that we mentioned above then you are ready to follow step-by-step guide on how to install Android 4.3 Jelly Bean based Carbon ROM on Sprint Galaxy S3 SPH-L710.

File Required(Download by clicking on it)
Carbon Android 4.3 Jelly Bean ROM For Sprint Galaxy S3 SPH-L710 [Filename: CARBON-JB-NIGHTLY-20131027-0440-d2spr.zip]
Google Apps [Filename: gapps-jb-20130813-signed.zip]

How to Install Android 4.3 Jelly Bean based Carbon ROM on Sprint Galaxy S3 SPH-L710

  1. Connect your device to PC using USB cable and then copy downloaded files to the SD card of your device.Important: Don’t extract any files.
  2. Disconnect USB and then turn off your Sprint Galaxy S3 SPH-L710.
  3. Now, boot into recovery mode. To do so, press and hold Volume Up, Home and Power button together until Samsung logo flash twice and then leave the button. You should see recovery menu soon. In recovery use Volume Keys to navigate between option and Power button to select an option. Alternatively try this:Recovery Mode without Key Combination.
  4. Perform a Nandroid backup of your existing ROM that you can restore later if this new ROM not work or you want to go back into your previous ROM. To perform a backup, select Backup and Restore, then on the next Lcd, select Backup again. Go back to main recovery menu after backup is complete.
  5. Now, perform data wiping task. To do so, select wipe data/factory reset, then select Yes on next Lcd to confirm your action. Wait few minutes till the data wipe is complete. Now come back to CWM recovery main menu. Select wipe cache partition and after wiping process done, select Wipe Dalvik Cache under advanceoption to perform Dalvik cache wiping.
  6. Select install zip from sdcard, then select choose zip from sdcard. Now, locate the Carbon ROM Zip file that you copied earlier in Step 1 and select it by pressing Power button. Confirm installation by selecting Yes – Install .zip on the next Lcd. The ROM installation will begin.
  7. Once the ROM installation process end, repeat the step 6 but choose the gapps-jb-20130813-signed.zip file instead of ROM zip to install the Google apps package.
  8. When installation is completed, go back to the main recovery menu and select reboot system now to reboot your Sprint Galaxy S3 SPH-L710 and boot up into customized Android 4.3 Jelly Bean ROM Carbon. The first boot will take time, so be patient!
  9. Returning to Previous ROM: To go back to your previous ROM, boot into recovery, select backup and restore then restore your previous ROM by selecting it from the list.
Congrats! Android 4.3 Jelly Bean firmware based custom ROM Carbon is now installed and running on your Sprint Galaxy S3 SPH-L710.
Read More..

Sunday, September 21, 2014

Update Galaxy S2 GT I9100 with Stable Jellybean 4 1 2 Firmware

 
What if we tell you to install the custom ROM firmware in your Galaxy S2 which only fixes all the bugs in your current default factory firmware of Jellybean? So, let’s check out on how you can install the same in your device before which you will have to follow the list of quick pre requisites which are mentioned below. The firmware which we will eb checking out is the Jellybean 4.1.2 firmware. We have also mentioned the Lcd captures of this custom ROM firmware which is dubbed as “Biftor ROM”.

Note: Though applying this firmware update will void the Warranty, you can at any point of time revert back to the factory firmware.

Quick Pre Requisites:
  • All the data in your Galaxy S2 GT I9100 should be backed up with the help of below mentioned steps so as to make sure that just in case if the data gets lost or corrupted, the same can be restored with the help of below mentioned steps,
SMS – Use “SMS Backup & Restore app”,
Contacts – Sync with the Gmail application,
Call Log - Call Log and Restore
Images, Songs, Videos, Files – Copy to internal / External SD Card,
APN and MMS Settings – Note down from the path “Applications > Settings > Wireless and Network > Mobile Networks > Access Point Names”
  • Enable the USB Debugging Mode in your computer from the path “Settings > Applications > Development > USB debugging”. Also, the minimum battery life should be a minimum of 40% or else there is a risk of device getting turned Off in the middle of firmware update.
  • As this is a custom ROM, you need to make sure that your phone is rooted and installed with the custom recovery image. Just in case if your phone is not rooted,
  • Custom Recovery image can be installed from the “ROM Manager” app which you can download from PLAY Store. Do check on whether your device is rooted or not with the help of the “Root Checker” app.
Disclaimer: Follow all the instructions mentioned in this article as if there is any damage caused due to not following instructions then we shall not be held liable or responsible. Just in case if you face any issues then we will try our level best to address the same.

Let’s proceed to the next step where we have mentioned the detailed guide which will help you upgrade the Firmware with the latest Jellybean 4.1.2 Android OS.


Procedure to Update Galaxy S2 GT I9100 with the Jellybean 4.1.2 Android OS:
  • Turn Off your phone so that it can be entered in the download mode. Recovery mode in Galaxy S2 GT I9100 can be entered by pressing Volume Up Key, Centre button, and holding both simultaneously press the Power Button after which you will get to see a green robot indicating that the device has entered in the recovery mode.
  • In recovery mode, select “install zip from SD Card” and choose the firmware zip file which you have placed in your device.
  • Once selected, you need to wait for the same to get updated in your device. It may take around 4 -5 minutes for applying the update. Once the device is updated, select the option of “Reboot System Now” for rebooting the device in the normal mode.
  • To check on whether the device is updated with the firmware or not, you need to check the same from the path “Settings > About Phone > Firmware Version” where you will get to see about the firmware version.
Note: If the device gets into the boot loop sequence or say gets stuck in the welcome Lcd, just re insert the battery and re follow the above instructions so as to again follow the above mentioned instructions.

So there you go, you have now successfully applied the latest firmware of Jellybean 4.1.2 in your Samsung Galaxy S2 GT I9100 smartphone. Do let us know in the comments section just in case if you face any issues as we are committed to address the same at the earliest.
Read More..

Thursday, September 18, 2014

Samsung I5500 Galaxy 5 Sim Ways Jumper fix problem

Samsung I5500 Galaxy 5 Sim Ways Jumper How to Fix problem,Samsung I5500 Galaxy 5 Sim Ways Jumper Line How to Fix problem,Samsung I5500 Galaxy 5 Sim Ways Line Missing How to Fix problem,Samsung I5500 Galaxy 5 Sim Ways Jumper Tricks How to Fix problem,Samsung I5500 Galaxy 5 Sim Ways Line Damage How to Fix problem,Samsung I5500 Galaxy 5 Sim Ways Jumper How to Fix problem Ways,Samsung I5500 Galaxy 5 Insert Sim Ways Jumper How to Fix problem,Samsung I5500 Galaxy 5 No Sim Card Jumper How to Fix problem,Samsung I5500 Galaxy 5 Sim Ways Jumper Guide Step By Step Procedure Here.
Read More..

Samsung Galaxy Young S6310 hard reset


Samsung Galaxy Young S6310 data:

GSM frequencies :850 900 1800 1900
Standard UMTS :900 2100
Type :Touch
Dimensions (W x H x D) :109,40 x 58,60 x 12,50 mm
Weight :112,00 g
Main display :Color / TFT
                    256k colors
                    320 x 480 px (3.27") 176 ppi
Talk time (max.) :3G: 400 min. (6,7 h)
Stand-by (max.) :3G: 250 h. (10,4 days)
PDA mode work time :7 h. (0,3 days)
Standard battery :Li-Ion 1300 mAh
Internal memory :4 GB
RAM memory :768 MB
Memory cards : microSD, microSDHC, microSDXC (up to 64 GB)
Operating system :Android 4.1 Jelly Bean
Processor :Qualcomm MSM7227A
Processor clock :1,00 GHz

How to hard reset:

If you forgot your Lcd lock combination or password follow these steps.
Warning! All data will be lost!
1.Press together volume up + home button + power button
2.Release your fingers of the phone when Samsung logo appear
3.Choose with volume buttons "wipe data/factory reset" and select it with power button
4.Choose "yes" with volume buttons and select it with power button
5.Wait untiil format is complete
6.Select "reboot"

Here is video how to do:

Read More..

Wednesday, September 17, 2014

How to Root Galaxy Note 2 N7100 on Android 4 3 JB Firmware

International version of the Samsung Galaxy Note 2 with the model number GT-N7100 has officially receive Android 4.3 Jelly Bean firmware update with build number N7100XXUEMK4. The new firmware is now officially available as an Over-The-Air (OTA) update via Samsung Kies as well.


Samsung N7100 Galaxy Note 2 users who have updated their devices with Android 4.3 Jelly Bean, can root their devices by using the tutorial below.

This tutorial uses the CF-Auto-Root file released by XDA-Developers Recognized Elite, Chainfire. File CF-Auto-Root Galaxy Note 2 which allows the user to root their devices easily without depending on the firmware. It was really supports Android 4.3 Jelly Bean and firmware in the future as well. Head to the CF-Auto-Root main thread to learn more about the root method.
Disclaimer: Rooting voids the warranty of your device. We and the developer of this rooting procedures shall not be held responsible if any undesirable outcomes may happen to your device. use of this root guide is solely at your own risk!

Pre-requisites

1. Install USB Driver for Samsung Galaxy Note 2 on the computer.
2. Enable USB Debugging Mode on the phone by navigating to Settings >> Developer Options.
3. Make a backup of all your important data before following the guide.
4. The Galaxy Note 2 should be factory unlocked and not locked to any particular carrier.
5. Ensure the battery of the phone is charged more than 80 percent.
6. The CF-Auto-Root file works only on the Samsung Galaxy Note 2 with model number GT-N7100. Applying this to any incorrect variant might brick the device. Verify the model number of the Galaxy Note 2 by navigating to Settings >> About Phone.

File Required
1. CF-Auto-Root for Galaxy Note 2 N7100 (CF-Auto-Root-t03g-t03gxx-gtn7100.zip)
2. Odin 3.07

Steps to Root Galaxy Note 2 N7100 Running on Android 4.3 Jelly Bean Firmware

Step 1: Extract CF-Auto-Root and Odin 3.07 files using winrar/7zip/winzip or any other extracting tool.
Step 2: Switch off the Galaxy Note 2. Then boot the device into Download Mode by pressing and holding Volume Down, Home and Power buttons together until a construction Android robot icon with a warning triangle appears on Lcd. Now press the Volume Up button to enter Download Mode.
Step 3: Launch Odin on the computer as an Administrator.
Step 4: Connect the Galaxy Note 2 to the computer using USB cable while it is in the Download Mode. Wait until Odin detects the device. When the device is connected successfully, the ID: COM box will turn to light blue with the COM port number. Additionally, the successful connected will be indicated by a message saying Added.

Note: If the Added message does not appear, then try re-install USB drivers or changing the port on the computer.

Step 5: In Odin, click the PDA button and select the CF-Auto-Root-t03g-t03gxx-gtn7100.tar.md5 file.
Step 6: Verify that Auto Reboot and F. Reset Time checkboxes are selected in Odin. Also, ensure the Re-Partition option is NOT selected.
Step 7: Double-check and click Start button in Odin. The installation process will now begin.
Step 8: Once the installation process is completed, your phone will restart and soon you will see a PASS message with green background in the left-most box at the very top of the Odin. You can now unplug the USB cable to disconnect your device from the computer.

Samsung Galaxy Note 2 N7100 running on Android 4.3 Jelly Bean firmware is now rooted successfully. You can now install any app that requires root permission. Verify the root status of the device by downloading Root Checker app from Google Play Store.

Thanks to all fellas at XDA who first tried out this rooting technique. This method was originally posted via XDA-Developers original thread.
Read More..

Tuesday, September 16, 2014

Samsung Galaxy Mini S5570 hard reset


Samsung Galaxy Mini S5570 data:

GSM frequencies :850 900 1800 1900
Standard UMTS :900 2100
Type :Touch
Dimensions (W x H x D) :110,40 x 60,60 x 12,10 mm
Weight :106,60 g
Main display :Color / TFT
                     256k colors
                     240 x 320 px (3.14") 127 ppi
Talk time (max.) :2G: 570 min. (9,5 h)
Stand-by (max.) :2G: 570 h. (23,8 days)
Standard battery :Li-Ion 1200 mAh
Internal memory :160 MB
RAM memory :384 MB
Memory cards : microSD, microSDHC (up to 32 GB)
Operating system :Android 2.2 Froyo
Processor :Qualcomm MSM7227
Processor clock :600 MHz
TouchLcd : yes
SAR (10g) :1,03 W/kg

How to hard reset:

If you forgot your Lcd lock combination or follow these steps.
Warning !All data will be lost!
1.Press together home button + power button
2.Release your fingers of the phone when Samsung logo appear
3.Choose with volume buutons "wipe data/factory reset" and select it with home button
5.Choose "yes" with volume buttons and select it with home button
6.Wait untiil format is complete
7.Select "reboot"

Here is video how to do:


Read More..

Sunday, September 14, 2014

Samsung Galaxy S i9000 Radio fix problem

Samsung Galaxy S i9000 Radio How to Fix problem,Samsung Galaxy S i9000 Radio not Working How to Fix problem,Samsung Galaxy S i9000 Radio Not Open How to Fix problem,Samsung Galaxy S i9000 RadioGps Problem  How to Fix problem.
Read More..

Saturday, September 13, 2014

Samsung Galaxy S i9000 Mic Ways Solution

Samsung Galaxy S i9000 Mic Ways Solution ,Samsung Galaxy S i9000 Mic Ways repair Solution,Samsung Galaxy S i9000 Mic Ways damage Solution,Samsung Galaxy S i9000 Mic Ways print missing Solution ,Samsung Galaxy S i9000 Mic Ways Solution repair guide step by step procedure here.
Read More..

Wednesday, September 10, 2014

Samsung Galaxy Note 3 N900 Android 4 3 Jelly Bean Firmware

Samsung Galaxy Note 3 SM-N900 recently updated to Android 4.3 Jelly Bean. If you yet to update then visit here: Install XXUDNA6 Android 4.3 JB Firmware on Galaxy Note 3 SM-N900 - How To Guide. So, if you updated your device to this latest firmware update then the next thing you looking for to root N900XXUDNA6 Android 4.3 Jelly Bean firmware running on Samsung Galaxy Note 3 SM-N900. In this page we going to help you to root XXUDNA6 Android 4.3 Jelly Bean firmware. Continue reading this tutorial.
A rooted device allow you to completely utilize the hardware resource as well as push the limitation that comes with stock firmware. Once rooted, you can access system files, can overclock/underclock CPU and GPU, can use various MOD as well as those apps that ask root access. However, once you root your device, your manufacturer warranty will be void. You can only regain it by following proper unroot process. You can learn more about benefits of rooting here: Benefits of Rooting Android Devices.
Before jumping into rooting of N900XXUDNA6 Android 4.3 Jelly Bean firmware, first we have to go through some pre-requisites.
Samsung-Galaxy-Note-3-Root-Method
Warning: This tutorial is only for Galaxy Note 3 SM-N900. Don’t try this guide on any other Android device. Also, we are not responsible for any damage caused due to the instruction given in this page. Try this at your own risk. However, it is very unlikely that your device will be damaged if you follow all the instructions as it is which are mentioned in procedure.
Pre Requisites:
Though root don’t erase internal memory data but we recommend to back up your data first before proceeding to avoid any uncomfortable situation.
1. Backup your device data. You can follow our ultimate backup guide.
2.  Make sure your device have at least 60% battery power. You can install an app like Battery Notifier BT Free on your Android device to check it easily.
3. You already have USB Driver Installed for Galaxy Note 3 SM-N900 in your PC. [Download USB Drivers]
4. Make sure USB Debugging is enabled otherwise you won’t able to transfer file between PC and Galaxy Note 3 SM-N900. [Guide].
Read More..

Tuesday, September 9, 2014

Samsung I5500 Galaxy 5 vibrators Ways Solution

Samsung I5500 Galaxy 5 vibrators Solution,Samsung I5500 Galaxy 5 vibrators Ways Solution,Samsung I5500 Galaxy 5 vibrators Not Working Solution,Samsung I5500 Galaxy 5 No vibrators Solution,Samsung I5500 Galaxy 5 vibrators Ways damage Solution,Samsung I5500 Galaxy 5 vibrators Repair Solution,Samsung I5500 Galaxy 5 vibrators Ways Print Missing Solution,Samsung I5500 Galaxy 5 vibrators Ways Damage Solution,How To Working Samsung I5500 Galaxy 5 vibrators Solution Step By Step Procedure Here.
Read More..